Download an Ableton Live Set From Polygonia
The Munich-based artist discusses the making of her new track "Neon Oracle" and her multidisciplinary approach to music making.
Download an Ableton Live Set From Polygonia
The Munich-based artist discusses the making of her new track "Neon Oracle" and her multidisciplinary approach to music making.
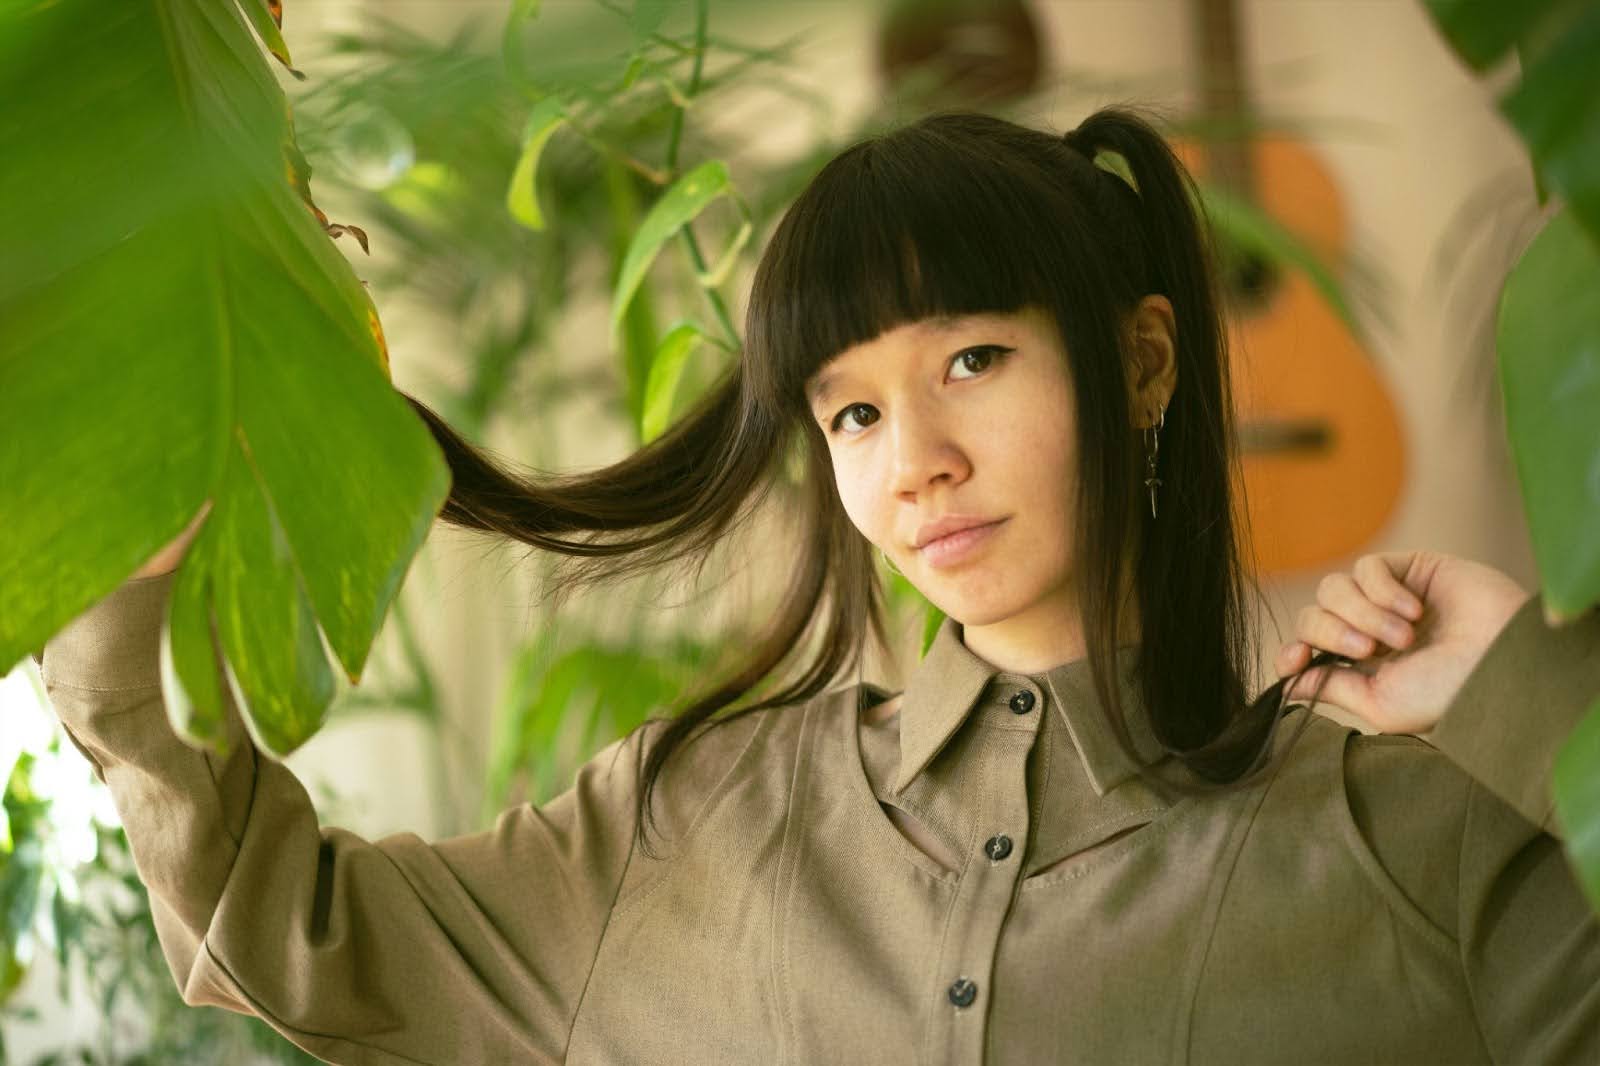
Few artists demonstrate such a multifaceted talent and the poise to balance it all quite like Polygonia, the musical alias of Lindsey Wang. Having risen to prominence with an impressive combination of technical mastery and artistic refinement, her work exemplifies a cross-disciplinary approach marked by a deep reverence for visual arts, music production, and sound design.
Polygonia’s tracks effortlessly blend organic textures with intricate rhythms, spanning a range of moods from deep and dark to playful and emotionally delicate. Her compositions traverse various genres, including techno, breakbeat, dubstep, ambient, and pop.
Beyond her solo projects, Polygonia is also a core member of the IO collective and the founder of QEONE, her newly launched label dedicated to championing emerging talent. Her creative vision also finds a further outlet in the trio Lyder, where she collaborates with musicians Niklas Bühler and Moritz Stahl, merging jazz and techno through improvisation, live looping, and effects pedals, creating immersive electroacoustic sound worlds for listeners to explore.
In partnership with Ableton, we recently sat down with Polygonia to trace her fascinating path from a childhood steeped in classical training to the moments that inspired her evolution into electronic music. Along the way, we delved into her creative philosophies, technical methods, and insights into the Munich music scene. For a direct look at her process, she has also shared the Live Set of her new track “Neon Oracle”.
Download the Live Set to Polygonia’s track “Neon Oracle” here*
*Requires a Live 12.1 Suite license or the free trial.
Please note: This Live Set and included samples are for educational use only and cannot be used for commercial purposes.
Lindsey, thanks for chatting with us today. Let’s start from the beginning—can you tell us a bit about your musical background?
I started out with classical music, I grew up with it. My father played in the Shanghai Quartet and with several orchestras here in Germany. My mother works at one of Germany’s biggest companies for sheet music and my grandfather was a clarinet professor. I graduated from a high school specializing in music. My focus was on the violin. I also played the piano.
As I grew older, I of course discovered pop music on the radio and MTV. That was my first connection to electronic music; because pop music is often produced with electronic elements. I was never really listening to the lyrics, I was more interested in how the tracks were produced. Later on, some friends introduced me to UK Dubstep. Back then it sounded super new and out of this world to me. That was when I really started getting into electronic music.
Was there a specific moment or, maybe an artist that inspired your move into the style of techno you make today?
In the beginning, I was not interested in techno at all. What was being played here in Munich wasn’t really my taste. I was digging into left-field hip-hop and finding these crazy beat producers on SoundCloud. There was this label, called Prrrrrrr Records. The label boss, Persian Empire, is also an instrumentalist and composer, he produces and performs in a really wild way. He was one of my key inspirations before I moved to techno. I remember hearing artists like Cio D’or and Rrose play at Freqs of Nature Festival. It was a sound aesthetic I hadn’t heard before. I had been quite into the psytrance scene, and somehow their sound connected to it, because it’s kind of trippy and psychedelic, but way more stripped down, more minimalistic, and more classy, let’s say. Cio D’or is a woman, which also inspired me, because I was like, “Wow, she’s a few generations above me, she has such a great presence on stage.” What she did was so fascinating to me. And Rrose too. They performed right after Cio D’or. It was the perfect combination.
While Berlin often receives most of the focus in Germany, how does the music scene in Munich compare?
We have a lot of amazing artists coming from Munich. It’s true, the focus is usually only on Berlin, but we sometimes find it a bit unfair. Just recently, I talked to a friend who owns a record shop here in town, and we were like, “It’s a bit sad that Resident Advisor doesn’t have many features about any events in Munich, because we have the amazing Blitz Club club for example, they book quite eclectic artists from time to time. I have my label night there. We also have Zirka Space where Radio 80000 is located. They have a lot of parties and concerts there too. There are a lot of great people in Munich, we all support each other a lot. We have a good sense of community here because it’s smaller. I think that’s why the competition somehow feels less intense. Everybody moves to Berlin to become a DJ. Everybody is a DJ when you talk to them in Berlin! But here, the pressure isn’t so huge. So yeah, we have a vibrant scene. I feel very comfortable here. I’m not considering moving away.
How would you describe the music you’re making these days?
My music is quite playful. It’s definitely not just techno. I also create bass music, ambient, drum & bass—a lot of things really. I sometimes even like to produce a little bit of weird pop music. I try not to pin myself down to one genre. But some characteristics are always present in my tracks, like organic textures, cheeky or sentimental harmonies, and some interesting rhythms that are not too obvious, but still groovy. I also often have airy bass sections, depending on which genre I’m working on.
Can you talk us through the labels you’re running? Are they mainly a platform for your own releases, or are you focused on putting out other artists’ work as well?
IO is more of a collective. It’s our platform to express ourselves as a circle of friends. Most of us have known each other since high school. It’s more about deep, personal connections. We’re also diversifying by developing audio software since we have a lot of expertise in the team. We love inspiring each other to experiment across different fields, which is the focus of IO. My other label QEONE, on the other hand, is my solo project. For QEONE, I release external artists. I’m not focused on big names. I try to take advantage of releasing digitally, as it requires less investment. This allows me to promote smaller, aspiring artists who I want to push. I really enjoy discovering new talent and offering a platform for emerging artists, rather than cycling through the same familiar names.
So, how did your new track “Neon Oracle,” which you’ve shared with us today, come to life?
I played in Brighton for DNO Records at their Mine event series, which focuses on dubstep. The event was meaningful to me because as I mentioned, my first real connection to electronic music was through UK Dubstep. I’d always dreamed of playing the kind of dubstep I love but with my own twist.
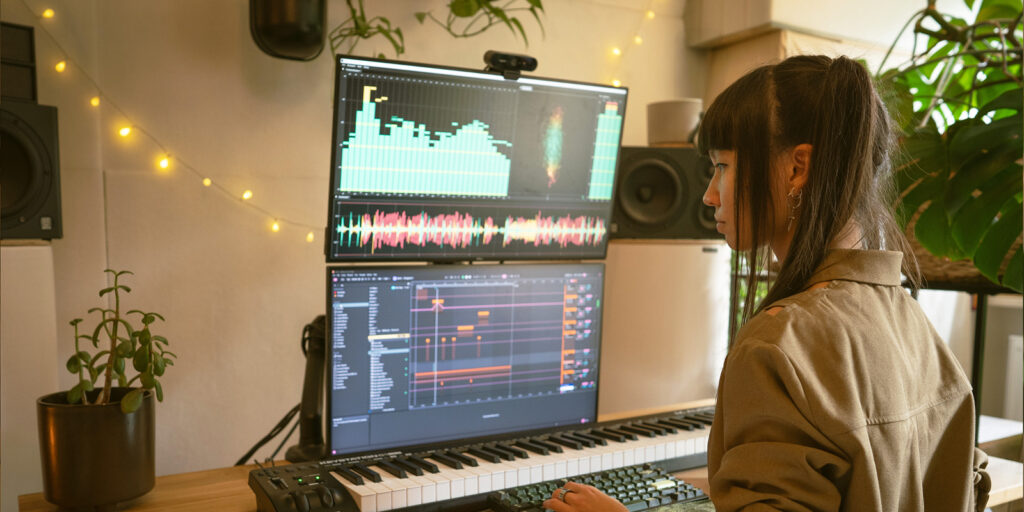
Normally, with dubstep, you’d expect a traditional setup where you play one track per deck, and it’s almost more fitting to play vinyl. But I’m a very digital DJ, so I love layering dubstep in a way that feels more like playing techno. I was so inspired and euphoric after that gig, as it was my first dubstep performance, and the sound system made it incredible. Shortly after, I felt this urge to create a track that captured that energy.
I never fully revisited dubstep until now. I figured, why not give it another shot? I wanted to try out new features in Ableton Live 12.1 and experiment. That’s why this track doesn’t sound like techno—it was born from that euphoric experience and a desire to explore a different sound.
The track has such detailed sound design—has that always been a focus in your work?
I previously worked as a sound designer. I once worked at a company that specialized in sound design for electric vehicles. We created infotainment sounds, which were more basic. However, we also did a lot of work with Max MSP to develop interactive synthesizers for vehicles, and that was where things got really interesting. One of my colleagues designed an interactive ambient synth that would change harmonies as the car accelerated, it was really cool!
“I prefer keeping my effect chains simple. If they get too long, I feel I lose focus.”
And you’re also part of a sound design-focused music project called Lyder, right?
Yes, Lyder is a trio. It has a strong instrumental focus, thanks to our saxophonist, Moritz Stahl, and my partner whose solo alias is FTP Doctor. Both of them are also also very focused on sound design. I’ve learned a lot from FTP Doctor. He taught me to have this “fuck it” attitude in music production, which has been really important.
We recently listened to a couple of our productions called “Weird Beats”, where I played saxophone and a Chinese flute in unconventional ways. Moritz uses a huge pedal board to send his saxophone through, creating these massive soundscapes. It’s incredible how he can transform his instrument into something so atmospheric with just those effects.
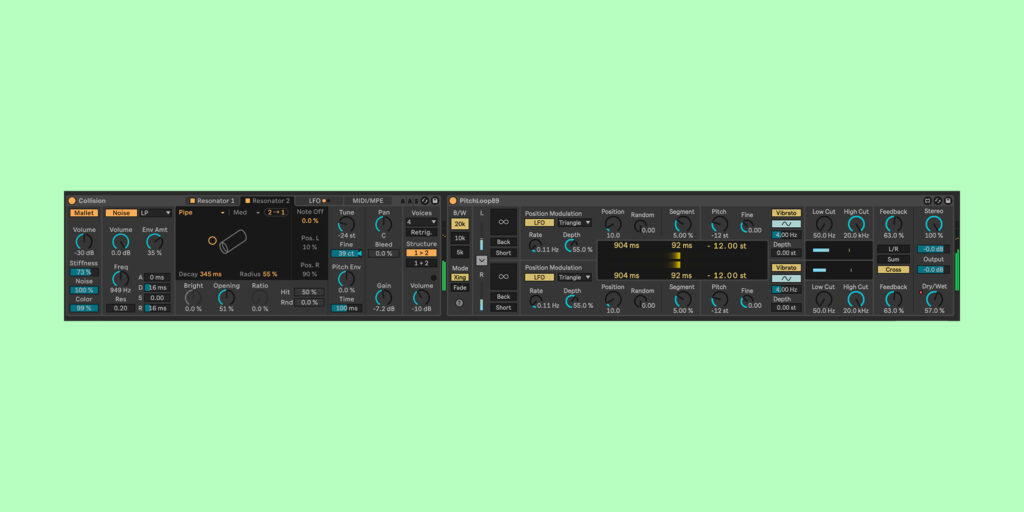
“Neon Oracle” opens with this beautiful, bell-like melody using the Collision and Pitchloop89 devices in Live 12.1. Could you walk us through the device chain and how you crafted this sound?
Sure. Collision is great for quickly creating natural-sounding timbres. While I often use Operator, for this project I challenged myself to try something different to avoid muscle memory. I used Collision and added Pitchloop89. It’s not a typical delay; you can adjust the pitch, which creates new textures and adds an atmospheric quality while still keeping the original sound present. Here, I have the wet/dry balance at 57%, with the pitch shifted down an octave to add a deeper layer. I prefer keeping my effect chains simple. If they get too long, I feel I lose focus.
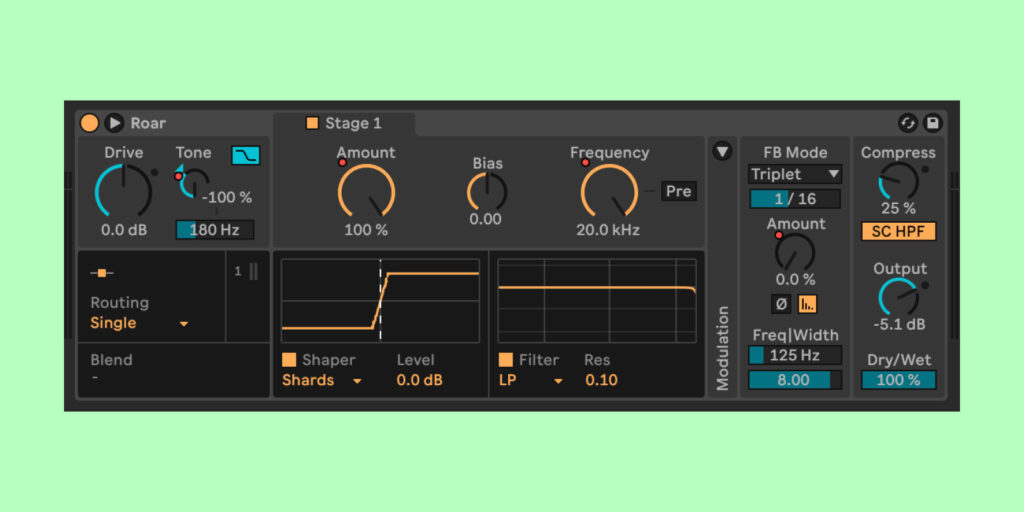
There’s a nicely distorted kick sound where you’ve used the Roar device, with some creative feedback automation. How did you achieve that?
This was the first project where I got to use Roar. Before, I used Ableton’s Amp device, but Roar is on another level, with more detailed control over distortion settings. The Feedback feature is unique for a distortion effect and adds incredible tension to the sound. I experimented with it and decided to automate the feedback, which created a wave-like movement. It was a playful process, and I loved how it turned out.
The automation throughout your project is impressive in general. How do you choose which parameters to automate?
From the start of my music production journey, I focused a lot on automation, since I only use Ableton’s session mode for live sets. I spent a lot of time learning to draw automation manually. But I also realized I could replicate a live feel by recording automation with a mouse, which brings a more human, less mechanical quality. I choose parameters that have a big impact, like envelopes in Operator. For live sets, I map a lot of Macros to envelopes to keep the sound dynamic.
You mention using Operator quite a lot. What draws you to this particular synth?
Well, Operator is a really basic but also incredibly versatile synth, which fits perfectly with my philosophy of creating complex sounds using simple techniques. Operator was the first synth I learned to use. I remember collaborating with my friend Dyside, who taught me a lot. He showed me how to use Operator, and in just a minute, he created 20 different synth presets. I was amazed and decided I had to master it, because even though it’s simple, you can make such a wide range of sounds, without the synth having a recognizable “Operator” signature.
That’s why I’m not really into hardware synths—some of them have a very distinct sound that’s hard to escape. With Operator, you start with basic wave shapes and can transform them into something completely different by controlling envelopes, adjusting oscillators, tweaking the LFOs, pitch envelopes, and timing. There’s no typical Operator sound, that’s why I use it for everything—from kick drums and hi-hats to beautiful or weird synth textures. It’s incredibly versatile.
Your philosophy of making complex things from simple techniques is interesting. Can we clarify what that means for someone who wants to apply that thinking?
Sure! When I say that, I mean I keep my device chains short and maximize the potential of each unit. Instead of stacking multiple effects and only using one knob on each, I make full use of the parameters within a single effect.
Even with simple elements, like sine tones, you can create complex textures if you modulate them cleverly. You don’t need to stack multiple oscillators—just one, with a well-designed envelope and maybe a delay effect, can generate a rich, organic sound. If you know what each parameter does, you can surprise people with the complexity you achieve. It’s all about building a strong foundation and understanding what you have before adding more.
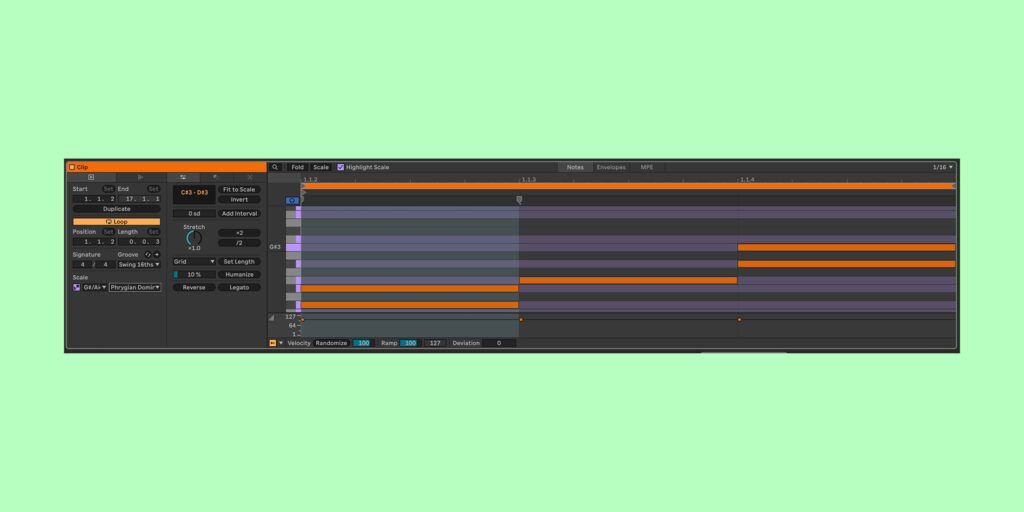
Track 27 in your project labeled “Arp” adds real tension. Could you talk a bit about how you developed the MIDI pattern?
With this arpeggiator, I didn’t use MIDI effects like I sometimes do. I often have a specific idea of how I want my arpeggios to sound, so I program them manually. In this case, I created a basic pattern but added harmonic tension by using two of the three notes close together in the scale. The interval between them is just a major second, which introduces a subtle dissonance.
For the synth sound, I used Meld. I experimented with different waveforms and chose a noisy shape. I also automated the envelopes to create variation, especially in the second part where the sound shifts an octave lower and the B oscillator comes in more prominently. The sound starts pure and then gains intensity as the second oscillator is blended in with automation. It’s a simple trick, but it changes the track’s story. And yeah, Meld is great for live sets—very low latency, which is perfect.
It seems like the secret sauce to the arpeggio is that interval you mentioned. You’ve also made a more advanced scale choice for your project, compared to a typical minor scale often used for this kind of music.
Yeah, it’s Phrygian Dominant. I love how, in Ableton Live 12, you can select more advanced scales. It makes things much easier. Even though I often figure out complex scales by ear, having this feature lets me precisely choose the character I want. The church scales, each have a unique quality. Phrygian, for instance, is more intuitive, but Phrygian Dominant is on another level of complexity. I thought it would be interesting, so I went for it.
How would you describe the Phrygian Dominant scale to someone unfamiliar with it?
In the church scale system, two scales sound particularly unusual: Locrian and Phrygian. Locrian is more unsettling, almost dissonant. I was actually debating between using Locrian or Phrygian for this track. Phrygian has a mysterious quality, and I gravitate towards that in my music. It adds an intriguing vibe. Each of these scales has its own color and can really add variety to your music.
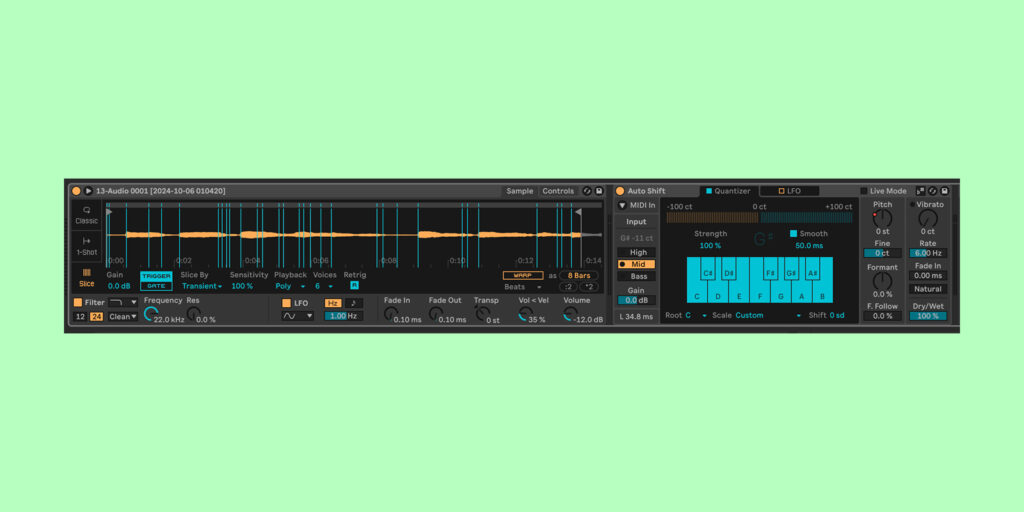
You’ve also used the Auto Shift device in Live 12.1 on your “Vocal Chops” track. Did you use the Scale Awareness feature to lock the device to the overall scale in the project, or did you match it by ear?
I did it all by ear. Although I see now there is a button on Auto Shift for syncing it to the scale of the project.
What I normally do, is draw a MIDI pattern of the scale I’m using, in this case with a grand piano sound, and let it play continuously. That way, I can compare the vocal recording and tweak it with Auto Shift to match the scale. I’m so glad Live has this feature now.
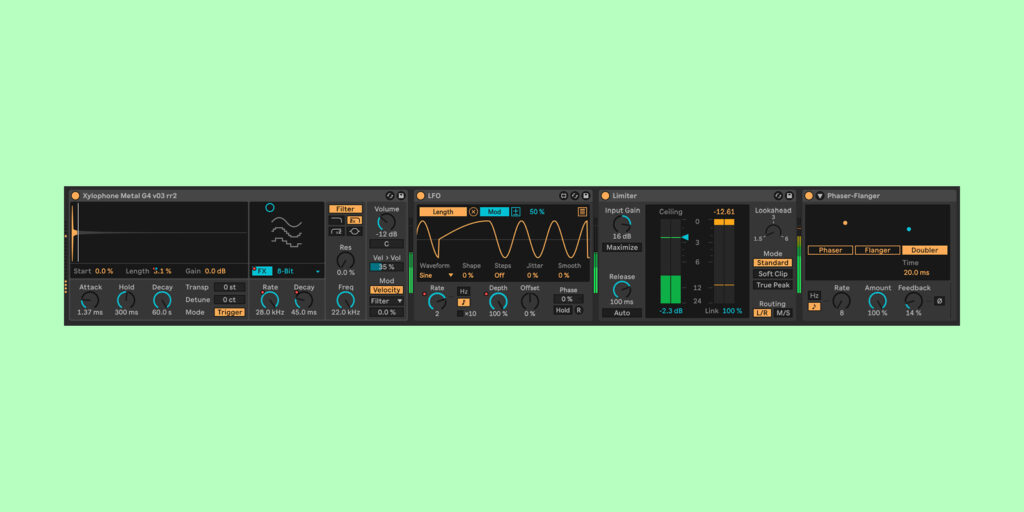
You’ve used the Drum Sampler device in Live 12.1 in a unique way, I see you’ve sampled a xylophone and created a melodic element. What inspired that?
For this part, I used a MIDI generator. I don’t remember the exact generator I used, but it might have been something from the polyrhythm section, like the Euclidean rhythm generator.
I found it really exciting to create a melody and modulate the sample length in Drum Sampler, which wasn’t possible before. This adds a human touch, similar to how you control the envelope when playing a violin pizzicato. I transferred that idea to the xylophone element.
So the LFO device on this track modulates the note length?
Yes, exactly. The fast sine LFO creates a subtle randomness in note duration.
Something interesting is happening on the Shifter device on your Snare track. What’s that doing?
So sometimes when I layer drums, I like to adjust their pitch to better fit the overall sound. In this case, I’ve actually automated Shifter. The automation changes only at the end, during the chorus, to fade the snare out. I also use it to tweak the pitch slightly during the first break. It’s mainly to add some variation so that the snare doesn’t sound the same throughout the break, making the whole section more engaging.
There’s also a great growling bass from Wavetable—and with two instances of Roar.
Thank you! Wavetable is simple yet powerful, and it comes with some great wave shapes. The trick with Wavetable is automating the wave position. I automated both oscillators and then adjusted the filter with high resonance to highlight specific frequencies.
The synthesis itself is straightforward. I also automated parameters like Warp and Fold. For the second oscillator, I played with Pulse Width and Sync. When using Operator in Ableton, I love automating everything I can because each oscillator offers unique modulation possibilities. In Wavetable, these parameters vary by wave category, but combining them creates a richer sound.
For distortion, I used two instances of Roar. Many producers split frequencies and process them separately, but both Roar instances are set to Multiband, so the sound gets treated differently in the low, mid, and high ranges anyway and enhances the overall complexity.
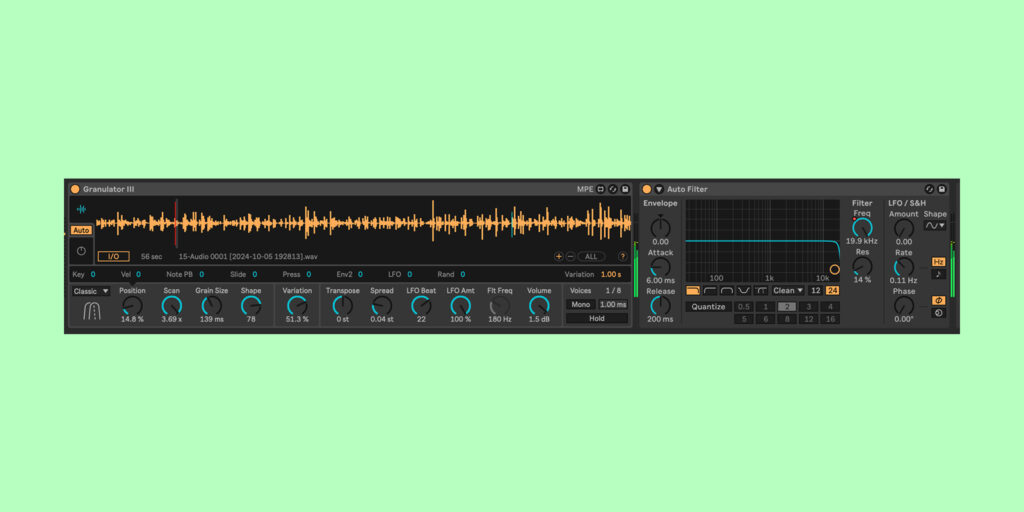
The bell textures made with Granulator III add a nice organic texture.
Oh, yes, on track 24. This was another resampling experiment. I took the bell texture we discussed earlier and ran it through Granulator III. I love resampling and then manipulating the sound even further. In Granulator III, I adjusted Grain Size, position, and the envelope to create a unique texture. It’s simple but effective.
And those fill melodies with the toms—how do you come up with those cool patterns?
Most of my patterns are programmed with a mouse. I usually have a clear vision of what I want, so random generators don’t always suit my workflow. I used Trap drums for this project because I love the beat programming style in Trap music. The 808 tom adds a punchy, chest-hitting feel on a big PA. Placing it carefully next to the kick, but not overlapping, gives the track extra groove.
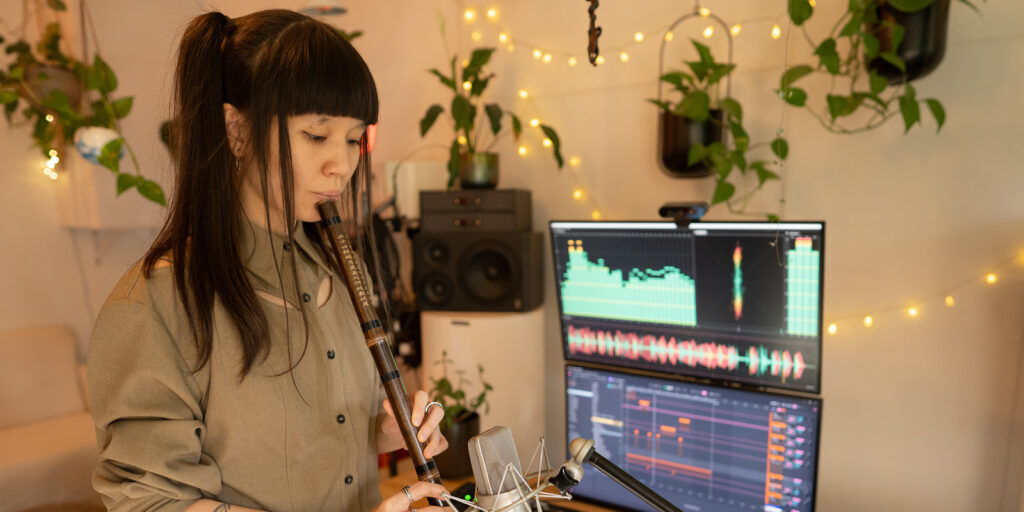
We have to talk about the flute as well—it’s such a nice addition to the track. Can you share the background of the instrument and what inspired its use?
Sure. I initially produced the track without the flute, but I felt it needed a human element. I love recording instruments just for fun, even if I end up deleting them later. In this case, the flute worked perfectly. It’s a small traditional Chinese flute that I’ve had since childhood, passed down to me. It has an incredible sound and creates fascinating overtones. I thought it added the perfect human touch, like the cherry on top.
This has been an inspiring conversation, Lindsey, thank you so much. To wrap up, what is 2025 looking like for you?
Well, 2025 is going to be very exciting. I’m going to release my second album. It’s quite eclectic. It digs into this realm where I’m using my voice and my acoustic and electronic instruments. Plus, I’m playing a live set at Outlook Festival, and it won’t be a techno set, so that’s also exciting!

