Artist Tips: Sieren
The Apollo Records artist details a range of tips focused on the new features in Ableton Live 10.
Artist Tips: Sieren
The Apollo Records artist details a range of tips focused on the new features in Ableton Live 10.
Since debuting as Sieren in 2012 with a set of remixes on Sinnbus Records and Project: Mooncircle, Matthias Frick has kept up a steady release rate that has seen him drop five EPs on Skullcandy Supreme Sound, Shades Recordings, R&S Records sublabel Apollo, and the aforementioned Project: Mooncircle, with his debut album, Transients of Light, landing on Christian Löffler’s Ki Records in 2016. These releases, the majority of which originate from Frick’s affinity for exploring field recordings and experimental soundscapes, all sit loosely in the UK post-rave continuum. Take Ascension, his most recent EP on Apollo, for example, which delivers a gorgeous mix of swinging broken beats, affecting melodies, and atmospheres reminiscent of Untrue-era Burial. It was also Frick’s most accomplished and complete artistic statement yet, fusing a tougher techno framework onto the ghostly sonic signature on which he had built his name.
Outside of his work as Sieren, Frick moonlights as Product Manager at Ableton by day, making him a perfect candidate for our Artist Tips feature. As an early adopter of Ableton’s Live 10, which arrived with a slew of new workflow updates, sound libraries, effects, and instruments, Frick is better versed than most to offer wisdom on the newest version of the popular DAW, and below you’ll find his tips on applying Ableton’s new features to your workflow.
Learn Hotkeys
It wasn’t until collaborating with Robot Koch on a few tracks in 2013 that I discovered what a difference knowing all or most hotkeys by heart makes to one’s productions.
Whereas before I’d constantly click around Live’s user interface to get a simple task done, I can now successfully reduce a few steps down to just one with the press of a key. I primarily work in Arrangement View, since it gives me the most flexibility to position various sounds on and off the grid.
The biggest upside is the increased desire/pleasure to experiment. Because it takes barely any time trying out more complex ideas such as micro-edits or rhythm variations, if the result is not that great, you’re more inclined to just straight out delete it, since you barely invested any time in it, whereas before you might think “oh, I’ve worked on this loop for so long already, I can’t let go of it now.”
Below is a list of my most used Hotkeys in Live (beware, Windows users might need to use CTRL instead of CMD), which in a way chronologically reflects my workflow:
CMT+T to create a new audio track.
CMD+SHIFT+T to create a new MIDI track.
CMD+G to group tracks, which has become a lot more important to me since Live 10’s Groups-in-Groups feature.
CMD+D to duplicate a track. This can be used, for example, if you have an audio track with loads of small edits and you want to use a different effect on a small part of it; or, in case of MIDI, add another layer with a different synth.
SHIFT+CMD+M to create a new MIDI Clip, previously selecting the time range which defines its length.
CMD+L to loop a marked section. I usually start out by selecting a range (maybe around four bars) and then start cutting up a loop.
Z to zoom in on a selection to get a better overview of what you’re about to cut up.
CMD+E to split a clip. Luckily my “E” Key hasn’t worn out yet, because I use this one a lot to splice out interesting parts of a loop which I’ll then re-arrange.
CMD+D on a selection of audio, sometimes in rapid succession, to see how, for example, the tail end of a high-hat or some random background noise behaves with the other drum elements of a track.
R has become very useful in Live 10 for me since it allows me to reverse a time-selection with just one key.
CMD+ALT+F creates a fade in or out based on a selection. Personally, I use this mostly when resampling the tail of a reverb (more on that later) onto a new track, before reversing it and creating a quick fade in.
CMD+J consolidates a time selection into a new clip. This is great because once you’re done creating a new rhythm out of tiny pieces of audio, you basically join them together into a new loop which you can then stretch out or further edit.
CMD+SHIFT+D to duplicate a selected time to keep things more interesting and evolving.
Template Your Workflow
There are a couple of steps I always ended up doing before starting a new project, so incorporating those into a template set were an obvious step for me.
For example, I always had the tendency to drive the volume up way too much inside Live, presumably to get more of a sense of what the track might sound like when mastered. By making all tracks default to -8dB and then adding a combination of Utility (+8dB) and a Limiter (-0.5dB) on the Master channel, I get a good sense of the final sound without creating too much havoc on my mix. On the upside, when doing the final mixdown to send off to the mastering agency, all I need to do is switch off the effects on the master, and I got a mixdown with enough headroom for the engineers to work with.
Adding instruments and effects you always use to a template set is also a good idea. I usually have a couple of groups for drums in my tracks which consist of a bunch of drum racks. Personally, I prefer to split drums into a few different drum racks, because it makes the overall mixing of drums a lot easier since you can see everything in the mixer.
Once you have your ideal instruments, effects, and utilities set up as a template, go to File / Folder and “Save Current Set as Default.” That way every time you start a new set, it will load your ready-to-go template project.
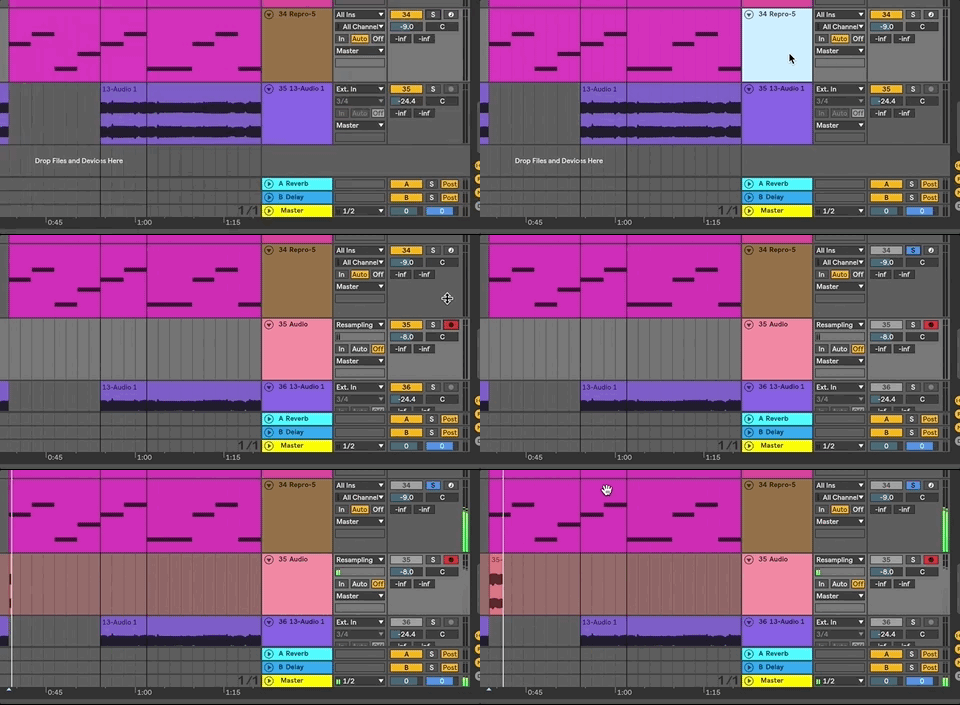
Another great workflow trick is using Resampling. Basically, in Live, Resampling takes the master output and records it into a new audio track. Before I started using this trick, I was painstakingly setting up internal routings in Live to get the output from Massive, for example, onto a new audio track. By just setting the audio track input to Resampling, all you need to do is arm the track, solo the one you want to record, and just hit play and record—you can check this out in the gif below.
Explore Live 10’s New Devices
Live’s new Drum Buss device has been a true game changer for me. The possibility to easily tweak and transform dull sounding kicks into something entirely else is remarkable. I often start with a simple 808 Kick and shape it up to something that suits my production well. The transients dial is also very helpful to sharpen up loops and bring out certain elements, like the snare in the following example.
I also end up using Drum Buss in places unrelated to drums. It can also do a great job at beefing up leads or even pads, giving them a different dynamic.
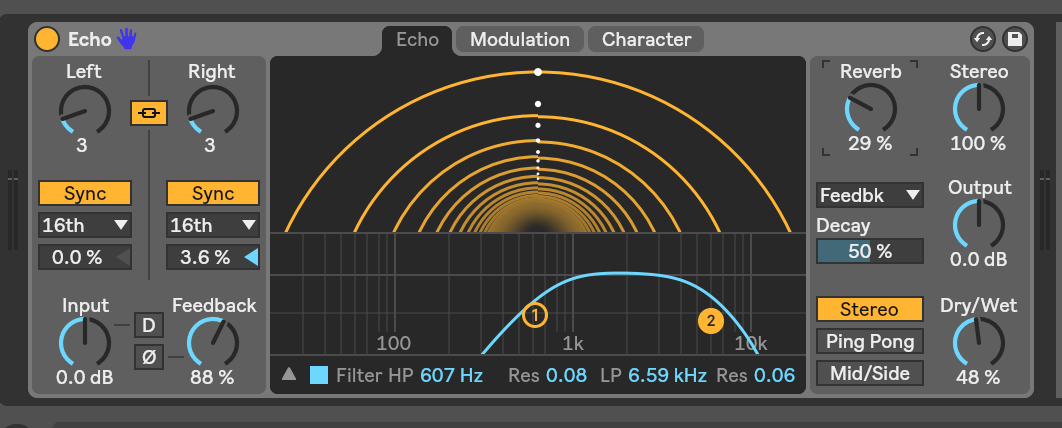
My other favorite device is Echo. Whether I need some ’80s BBD-style delay or a proper space echo emulation, Echo usually has me covered. It gives me the flexibility of signal routing, which I previously had to go to a variety of different plugins for the desired effect. Specifically, the ability to modify the EQ on the feedback as well as add reverb on either the outgoing signal or the feedback line is something I always wanted in a delay plugin. It’s even great for just adding some tape noise to your mixes for a more analog feel.
You can’t really talk about Live 10 without mentioning Capture. It’s been a true game-changer for me when it comes to using plugins. I often noodle around with various melodies only to find myself not being able to reproduce it once I hit record. Capture listens and records everything in the background and you can instantly create a new clip with all the MIDI notes with the click of a button. I barely even hit record for MIDI at all these days since Capture works so perfectly for me.
Find Hidden Rhythms in Loops
One of my favorite techniques is to reveal less than obvious rhythms in loops. Drum Buss really helps to bring out rhythmic elements that might not be immediately obvious because of the dynamics of a recording. I often randomly cut up a loop, then rapidly press CMD+D to duplicate a tiny fraction of it (often with an uneven length) to lay it out beneath a kick drum and see what happens. This is kind of a trial and error approach since not all rhythms work well. But since using hotkeys, the whole process is rather quick, so you don’t feel bad if something doesn’t work out and you can immediately try the next part.
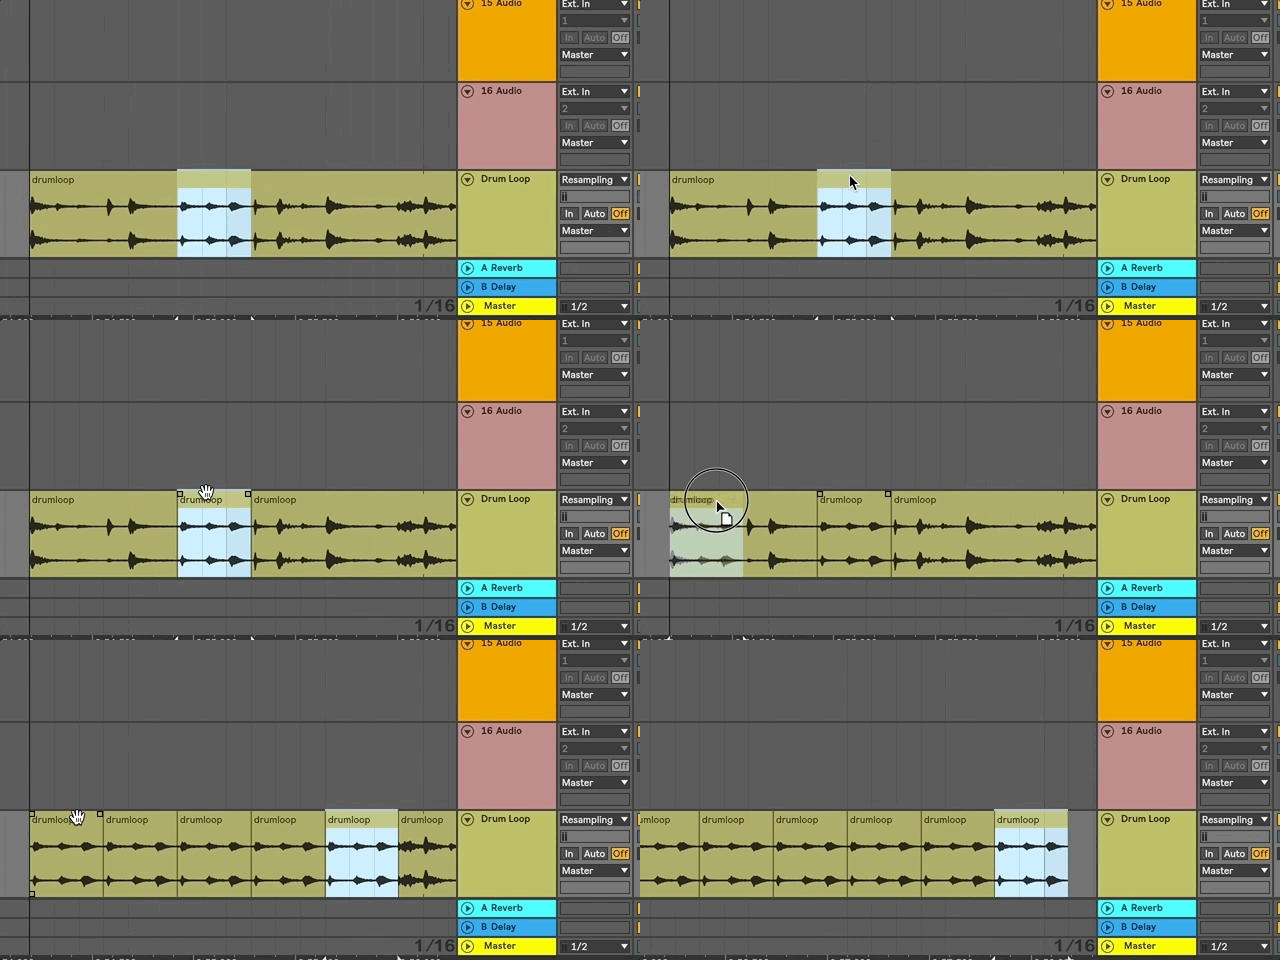
Another great way that I’ve discovered recently thanks to collaborator Troy Gunner was making polyrhythms out of loops. This seems super obvious and it’s one of those production things you maybe kind of know about deep down, but tend to forget until someone shows you. Dragging a loop into the arrangement view and then setting the loop length and start point to arbitrary numbers can create nice polyrhythmic elements—even from a one-bar loop, like below.
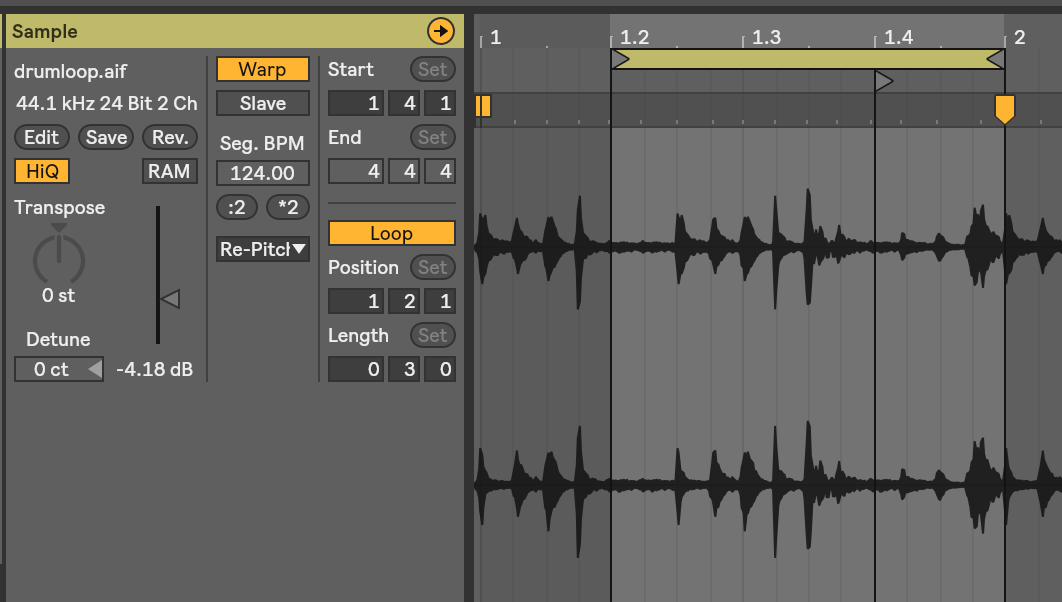
Live 10’s arrangement makes finding rhythms even easier, since you can now drag and move an audio clip’s content right in session view (ALT+Shift on lower bottom half of a clip). This has really sped up my workflow quite a bit, too.
Constrain Yourself
I often find myself overwhelmed with the possibilities at times, especially when already suffering a little from writer’s block. It’s easy to get lost in the variety of plugins, hardware, and samples these days. What really helps me to break the cycle is to constrain myself to a set of samples or a field recording and maybe one or two instruments and really dig deep. Personally, especially when it comes to synths, I do rely on presets as a starting point quite often—I pick the sounds that are closest to what I have in mind and then take it from there. While this is great when you have a good idea to begin with, you can get lost in the variety of options when you don’t have a clear vision.
Constraining yourself in the sound design stage by starting with an empty patch and then going deep in trying to come up with new sounds is a great way to break the cycle. Even if you don’t get good results, you still learn a lot more about the synth itself than by starting from a preset. In my opinion, this applies more to plugins than real hardware, because you might not interact as much with a plugin as you’d do with an actual tactile piece of gear.
When working with real hardware I try to make sure that I’m recording everything that comes out of a given device while working on finding a sound. I often end up going back to the recording and then cherry-picking the bits I really liked.
There are, of course, also days where even constraints don’t help much. If I don’t find myself with a great idea, I focus on creating material for future tracks. That can be loops, my own presets, effects chains or doing field-recordings in and outside the house. It’s also easier to sort through your own material thanks to Live 10’s new browser collections.
