Artist Tips: Danny Daze and Shokh
The two collaborators offer insight into the manipulation of audio in Ableton.

Artist Tips: Danny Daze and Shokh
The two collaborators offer insight into the manipulation of audio in Ableton.

Back in August, Danny Daze and Shokh teamed up for a single on Kompakt‘s long-running Speicher series. Released alongside a cut from Patrice Baumel, “Aire” presented the perfect fusion between Daze’s electro-punk ideals and Shokh’s hypnotic techno. The single was the latest in a run of collaborations for the pair, which has included a remix for Rebolledo and an EP from Shokh on Daze’s Omnidisc imprint, released in February of this year. Shokh’s The Man was the 12th release for Omnidisc—which Daze launched two years ago with a four-track collaborative EP, featuring cuts written alongside Philipp Gorbachev, Drvg Cvltvre, Deroboter, and 214—and the 13th landed earlier this month from Gabo Barranco (a.k.a. AAAA). Gabo’s EP, Jazz D, like much of the output before it on Omnidisc, melds distorted rhythms with hooky synth lines and classic, analog driven sounds into tracks built purely for the floor.
Although using classicist sounds and familiar tools, Daze and Shokh have a way with injecting their personalities into their tracks. Like any great artist, it’s how they interpret these sounds and tools to craft something that is their own. For Daze, it’s the “detailed manipulation of audio” that sits at the core of his work, whereas Shokh loves the subtle “errors in production” that give his mechanical techno a human feel.
For the latest Artist Tips feature, Daze and Shokh once again team up to offer insight into their production ideals and how they derive the sound aesthetics they are both so widely regarded for.
Danny Daze:
Using transients to your advantage
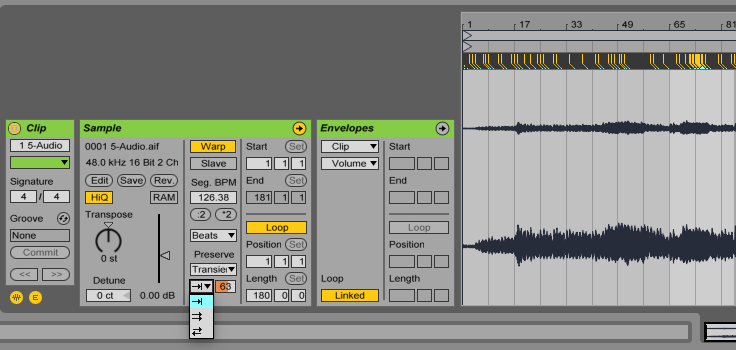
I really love recording audio and manipulating it to get a completely new sound. Inside any audio region, by setting the granulation resolution to “transient” and the transient loop mode to “forward,” you can then take the audio region and re-record back in real time while you mess around with the “transient envelope.” Unfortunately the “transient envelope” cannot be midi or key mapped with the version of Ableton I use (9.7.1), so this has to be done with a mouse in real time, which actually creates it’s own mechanical groove which I really like. I use this a lot when I do field recordings and want to take an audio source like an airplane for example and use the sound as hi hats. The more you bring down the transient envelope the less sound passes through. This works especially well if you quantize your audio, both the original sound source and your newly recorded audio region.
Re-recording MIDI

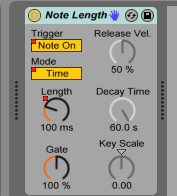

One good way to get really random things going on that one usually wouldn’t think of is to re-record your midi and try everything possible to get new things out of it. I usually record my midi several times by feeding the original midi channel into an arpeggiator and turning the arpeggiator on/off throughout the track. Make sure to mess around with the arpeggiator settings to get the desired effect (rate, hold, gate, ect.). I’ll record that entire channel into a separate midi channel so I can have the actual notes of the arp, then I’ll take that newly recorded “midi arp” channel and put a “note length” plugin on it and again, record this whole new take on to another midi channel. Usually with the “note length” plugin, you can get incredible glide effects which really gives the track a bit more funk and extremely random rests and pulls.
Removing transients from audio
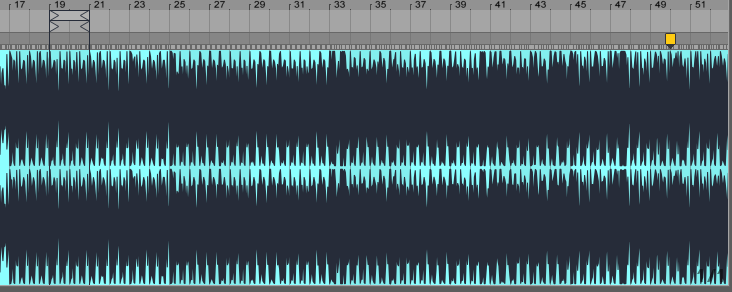
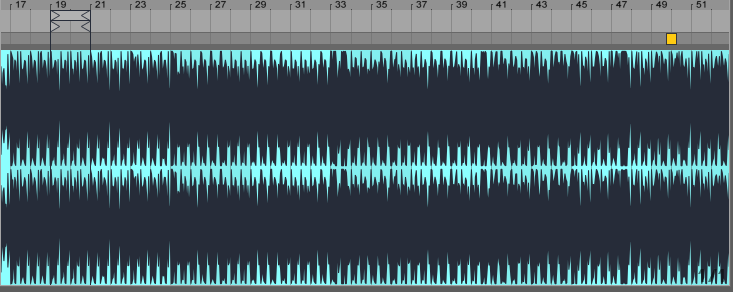
One thing I’ve always done at the very end of my work flow, before sending out to master, is to remove the temporary transients from audio regions. Go into every audio region and delete the ghost transients (grey transient markers). The less of those you have, the less your computer will process warping. My goal is to only leave 3 to 4 permanent transient (yellow transient) markers within the audio region. One at the beginning, one 1/4 of the way way in, one 3/4 of the way in, and one at the very end. In order to quickly delete all the temporary transients, highlight all inside the region editor (command + a), then delete the ghost transients by holding down (command + shift + delete). It may not be fully audible to your ears, but doing this to all your audio regions helps out opening the low end.
Shokh:
Impulse Random Addition
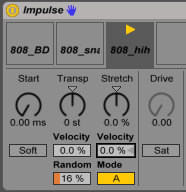
When it comes to drums, I prefer to load them into the Impulse instrument. It comes with this simple random function that works in relation to the transpose/pitch and to give every sound movement and modulation at random times. To get a little bit of groove just add a little bit of it on every sound that you load into this sampler, even it’s a bass-drum and you’ll create more of an elastic feel to the drums rather than them staying so consistent.
Grain Delay
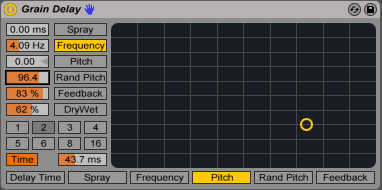
My favorite plugin in the context of “randomness” is the Grain Delay. I mostly use it for snares or claps. Here I take two different ones, one for the attack and one for the effect. So on snare one, I make it smack more in your face and can be really short, while snare two would be more muffled and in the background. Put them on different tracks and add the Grain Delay to snare two. Take away a little bit of the attack to leave space for the attack of snare one. Then play around with the time, feedback, and, of course, the random pitch.

