Artist Tips: Bonobo
Simon Green details seven techniques that led to the creation of his latest album, 'Migration.'

Artist Tips: Bonobo
Simon Green details seven techniques that led to the creation of his latest album, 'Migration.'
Since the release of his acclaimed Black Sands album, Simon Green (a.k.a. Bonobo) has ridden a somewhat meteoric rise to the upper echelons of electronic music. This rise can mostly be contributed to his emotive, cinematic style and deft production artistry; it’s enticing pop music in the truest sense.
Although his stocks have risen considerably since Black Sands, Green’s music has maintained a logical stylistic progression rather than tipping too far over into the mainstream—listen to Black Sands, The North Borders, and his latest, Migration, for case in point; ironically, this linear progression is something Green’s latest album has drawn criticism for. Whichever way you look at it, however, Green’s consistency is never in question.
Filled with serene beauty and a slight dose of melancholia, Migration—released January 13 on label home Ninja Tune—is Green’s most sophisticated work yet, it’s a dreamlike collection of cuts that stir emotions and, at times, move the body. Like The North Borders before it, Migration features guest spots from a host of talented vocalists, this time Nick Murphy (a.k.a. Chet Faker), Hundred Waters’ Nicole Miglis, Rhye, and Innov Gnawa. As Bruce Tantum stated in his review of the album, it’s “an intricate, fine-tuned return to form, one that both soothes and thrills.”
With Migration now out in the world, XLR8R paid a visit to Green’s studio in Los Angeles to peel back the layers of the album and get the inside word on some of the techniques that led to its creation.
Offset Sample Start Positions
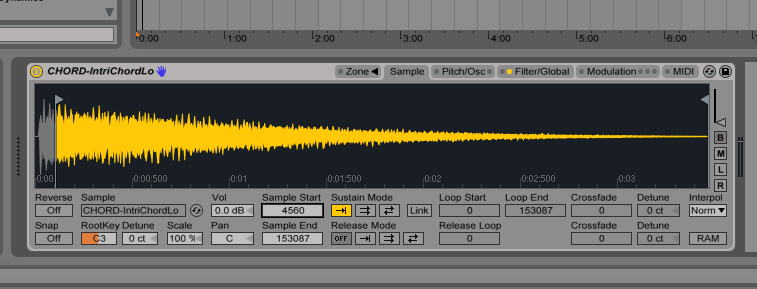
Offsetting the sample position every time the sample hits will create more random movement in short samples. One of the techniques that I first started with was offsetting the sample start position with an LFO. So if you had a hi-hat you wanted to have more movement, or if you wanted more of a glitch feel in a sample, put a Random LFO on the sample start field of the sample in Sampler—this means that every time the sample hits, the start point will shift to a random point on the sample to begin its playback. I started doing it on hi-hats but I realized you can do it on nearly anything and it gives much better variation and a more human feel to your loops. Once you start to dial in the controls of the LFO, you can really create some subtle yet interesting rhythms and movements.
CLICK PHOTO TO ENLARGE AND ENTER GALLERY
Follow Actions
Another way to create interesting ideas is to use follow actions. I would basically start with two channels: on one I would have a chopped up Rhodes with a bunch of different clips, and each clip would be a different note. I would set follow actions so that the clip would loop for five bars and then play a random clip from that channel next, which would then do the same. Then on the second channel, I would do the same thing but make the clips only loop for three bars. That way both channels are looping and changing randomly and going on indefinitely. You can select all the clips and change the follow actions for all the clips at once. So when I did this, I would create five minute renders of these melodic loops. I did three sections and bounced them out and then used it as something to improvise off. So I had John Hopkins come in and improvise to these sets of five-minute loops I had created. What I really like about this is how you have an Ableton algorithm and a pianist jamming and interacting with one another. This idea formed the basis of the title track of Migration.
PaulStretch
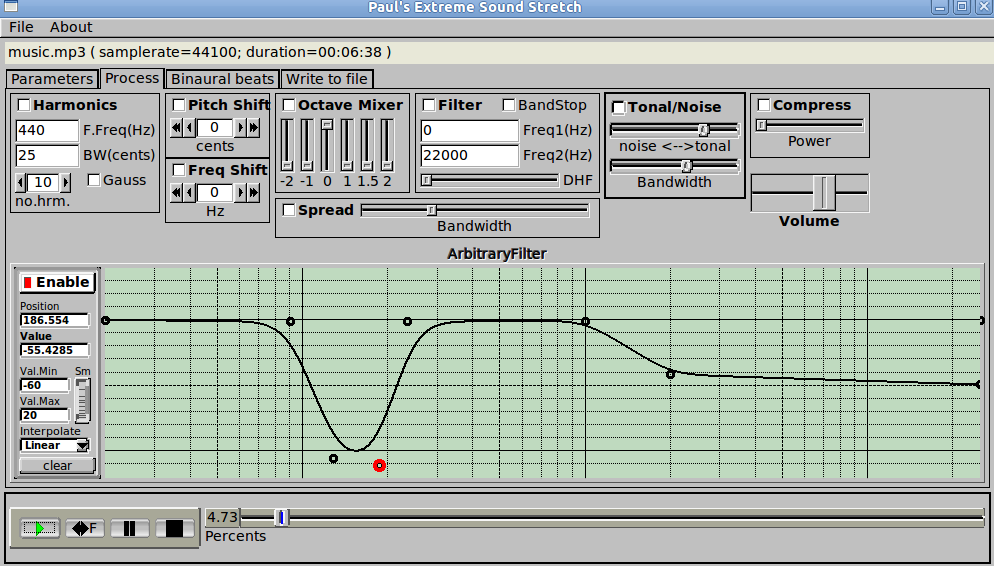
PaulStretch is a really out-there, standalone audio stretching engine. So with “Second Sun,” I took a portion of what I was working on and took it into PaulStretch and then bring it back into the track to sit low in the mix as a drone version of itself. It gives the track a good base and a haunting texture to it. I use the PaulStretch audio as a sound bed to further build the track from. It’s also a great tool to start your sets with, a palate cleanser for the dancefloor. Throw your first track into PaulStretch and it can be used to create a nice opening build up.
Effects Chains
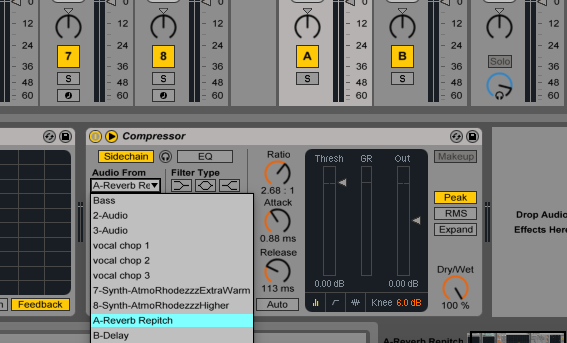
I’ve got a few return effects chains that I have built for my live set. One is a pitched, harmonic reverb chain. I start with a reverb, then the reverb goes into a driver, then a re-pitcher, and then I compress the whole thing to itself. So at the end of the chain, have a sidechain compressor and sidechain it to itself. So what happens is that the note or element will be allowed through clean for a split second before the reverb hits and comes back on itself.
Making Patches out of Found Sound
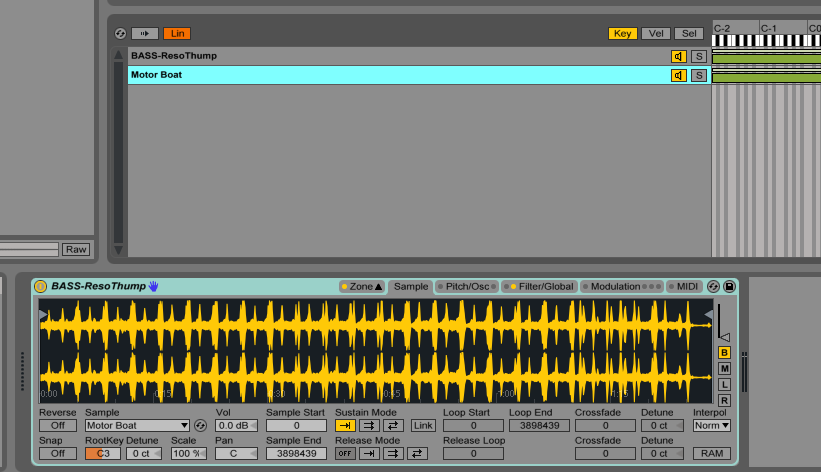
I record a lot of stuff on my phone when I’m out and about and regularly use the recordings in my tracks. For example, I was in New Orleans on one of those fan boats and noticed the really interesting texture and sound it was making. I recorded the fan and then layered it in a sampler to be the basis of a synth patch. It gives a nice alien-like sound and is an easy way to give your synth patches personality.
Vocal Treatments, Chops, and Edits
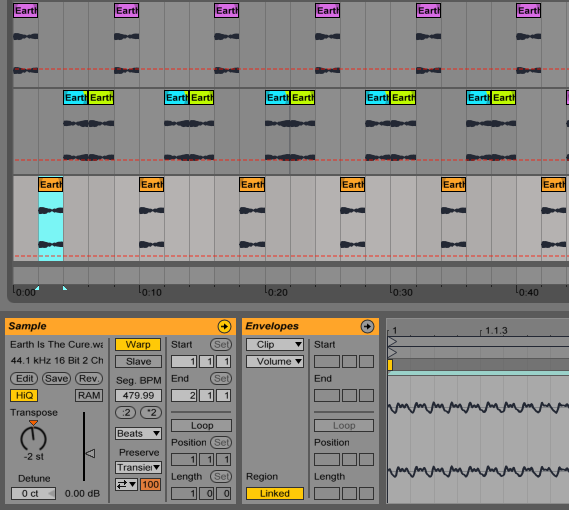
This is basically an exercise in layering. I always work with audio on the arrange page and with vocals, I like to chop up lines and take the syllables from different parts of the vocal line to create something a little more interesting. I normally start by messing around with one loop and see where it takes you. Pitch the chops up and down to create an interesting musicality to the loop. Keep building layers that work off each other in a call and answer.
Effects on Bass
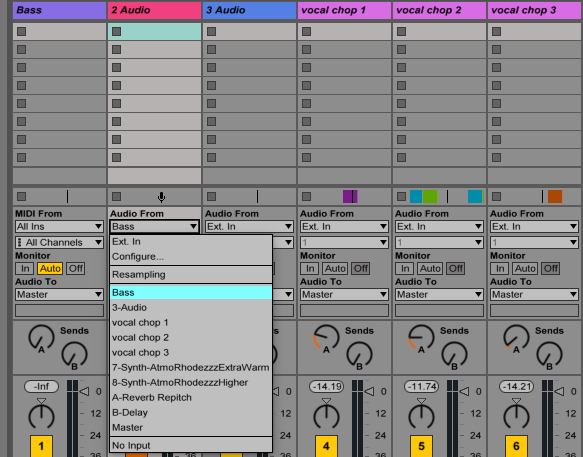
I often use a return channel to get some shape out of the bass. It’s a good way to split the frequencies of the bass so that the sub bass is clean and in mono and the higher end of the bass sound can be filtered off—have it on an audio channel and that’s where you can use effects. So start with your bass vst on one channel and then create an audio channel next to it with the Audio From input coming in from the bass vst channel. So on the audio channel roll off all the sub bass with a filter and you can then apply effects, automate the effects, and generally mess around with the bass without muddying the subs—you still have the body of the bass present but also a really interesting top end. You can use this effect on any sound with a low-end, or any sound in general—it’s a good way to split frequencies and effect just one aspect of a sound.

