Artist Tips: AIDA
How to inspire creativity within production.
Artist Tips: AIDA
How to inspire creativity within production.
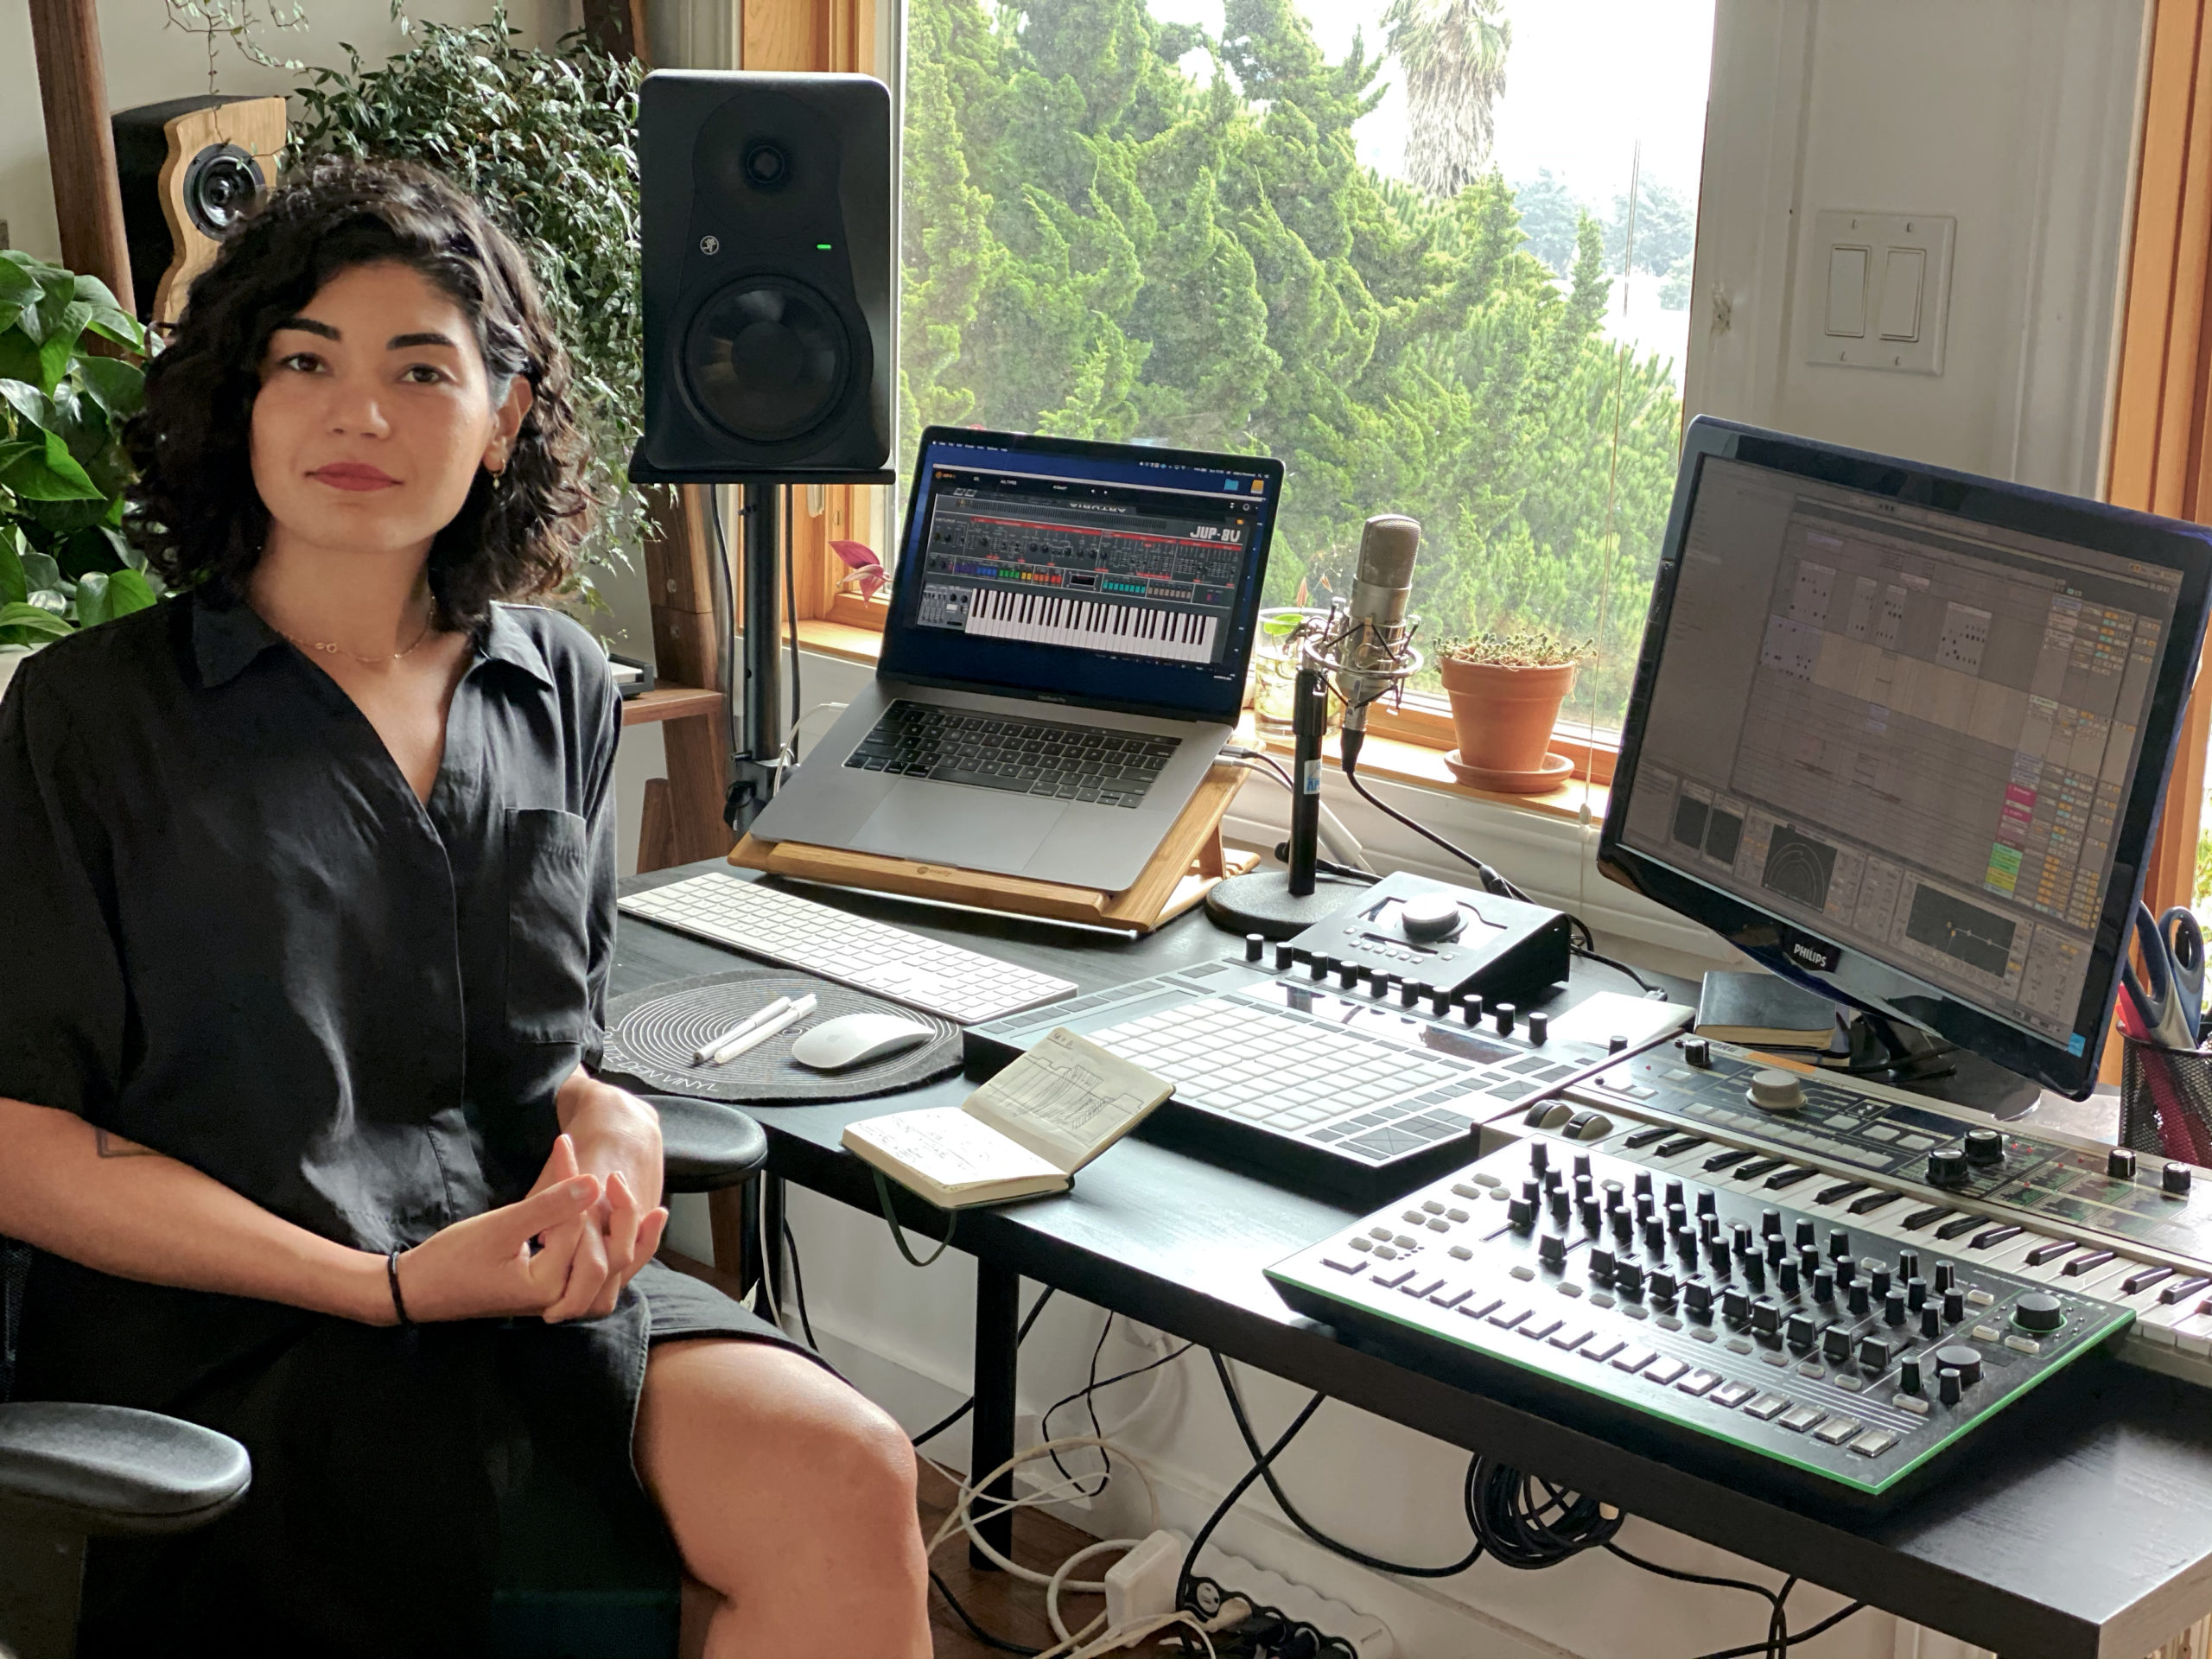
Aida Rezaei, or AIDA, is an Iranian-born, Canadian-raised artist based in San Francisco. By 2017, AIDA had become a staple in Vancouver’s music scene, and this paved the way to tours through Europe and North America. (Her 2019 performance at Bass Coast Festival was one of the event’s stand-out sets.) The dichotomy of east and west inhibits her being and infiltrates her sound as she masterfully blends traditional music from around the world with groovy house, techno, and colorful breaks, making for a rich sonic experience. When she’s not touring, she’s working as a lead product designer at a financial technology startup, working a busy music career around a demanding nine-to-five.
2019 was a breakthrough year for AIDA the DJ, but she’s also a skilled producer. You’ll find her early studio experiments sprinkled through her sets, and among the first is “Yek o Do,” which she contributed to this month’s XLR8R+. The track is a “modern love song” that she produced several years ago overlooking the mountains of the pacific northwest. With more tracks on the way, Rezaei offered to walk XLR8R through her techniques for inspiring her to create.
There are a finite number of ways for an artist to approach skills of a technical nature, yet infinite ways one can approach creativity. Although creative and technical growth are equally important in your process, I find creative inspiration to have the power to shape an artist’s imagination in ways that add unique purpose and meaning to their work. All of that lies in storytelling, getting the imagination of the audience going, provoking thought, or amplifying feeling. This, to me, is the interesting part of creating. For these tips, I want to share a few approaches I take to inspire creativity within production.
Study Arrangements Using a Pen and Paper
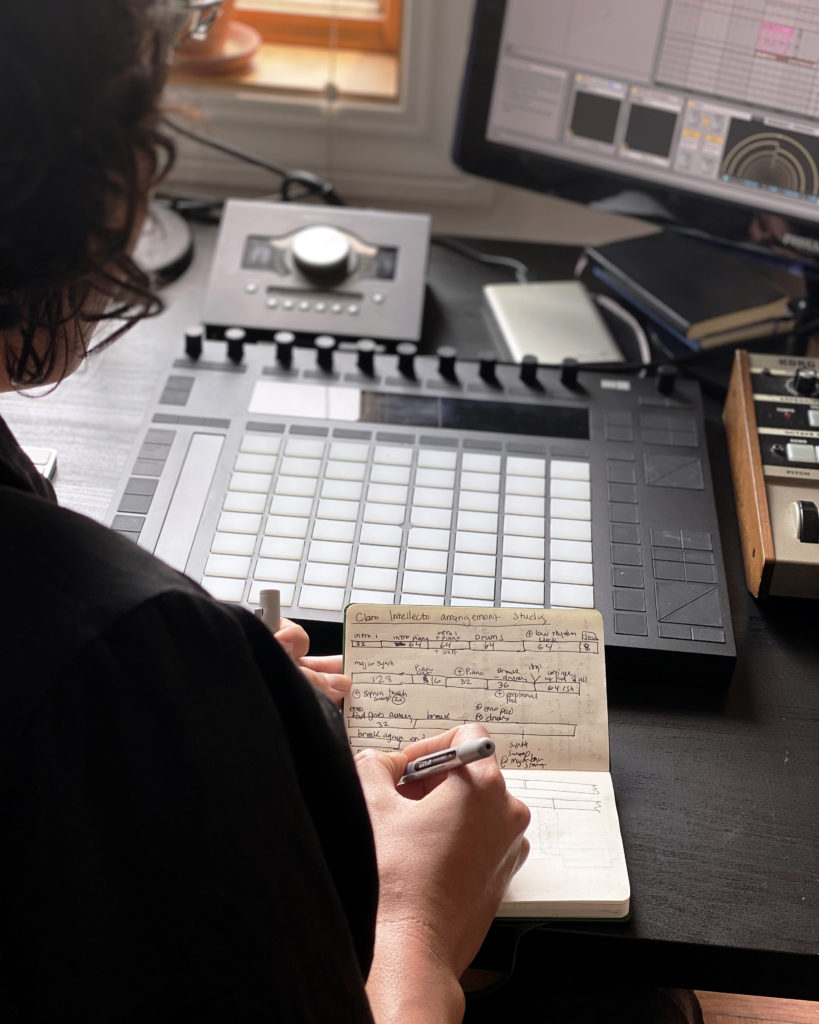
This tip is about studying the arrangements of music you admire and drawing it out on paper. This allows you to learn about how different arrangements can be used for different types of storytelling so you can create unique arrangements faster and with a goal in mind.
Anyone who has read stories or watched enough films can recognize the classic plot-line: the story begins; the audience gets to know the players in the story; the story moves up towards a climax; and then it comes down into a resolution. Electronic music, for the most part, unfolds with a similar pattern. There is an introduction; then tensions and releases; then an outro. Music geared for the dancefloor especially has a classic pattern, with a small and then a larger breakdown.
As an artist, while you have full control over how you write each of these sections, it can be challenging to break the mold of this arrangement. This is when studying the works of people you admire to see how they’ve structured their songs can be beneficial. The easiest way to do this is to study a single track.
Here is how: find a track that you want to use as inspiration, and then grab a pen and paper and just start listening. I usually listen at least twice. The first time I only count the bars that pass and break up the song into sections: intro, verses, breakdowns, and other sections that stand out based on varying elements. Write down the instruments that are present. In the example below I have studied Claro Intelecto’s “Peace Of Mind” on Electrosoul. In this example, you will see how I have counted the number of bars and marked them off in sections. Each line represents four bars.
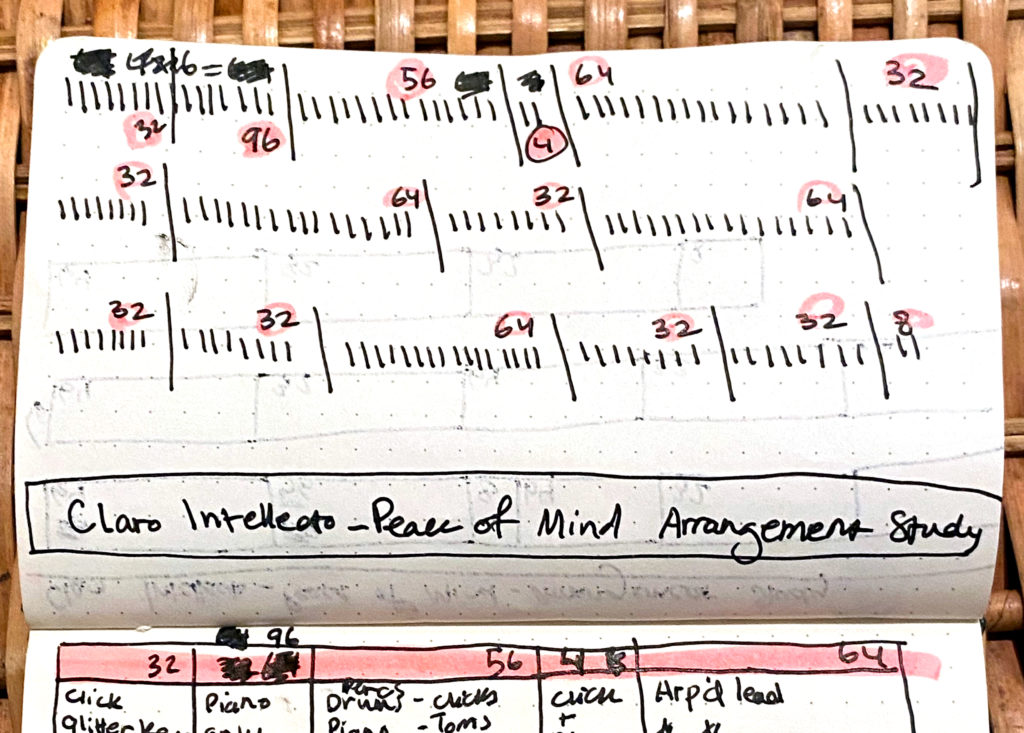
Once you have listened to the track once through and counted the bars in each section, I suggest you start listening from the beginning again. This time, listen for three things: (i) sounds and instruments that go in and out; (ii) the effects that are used; (iii) and abstract feelings and vibes. You should also record anything else that stands out.
Here is a picture of the second round of listening to the same track. This time, I have written the instruments and sounds that I see coming in and out. What became valuable information for me was identifying that the synth sweep, emotional pad, and arpeggiated lead were contributing to the complex emotions that this track triggers in me. That’s the type of emotional trigger I want to create in my music.
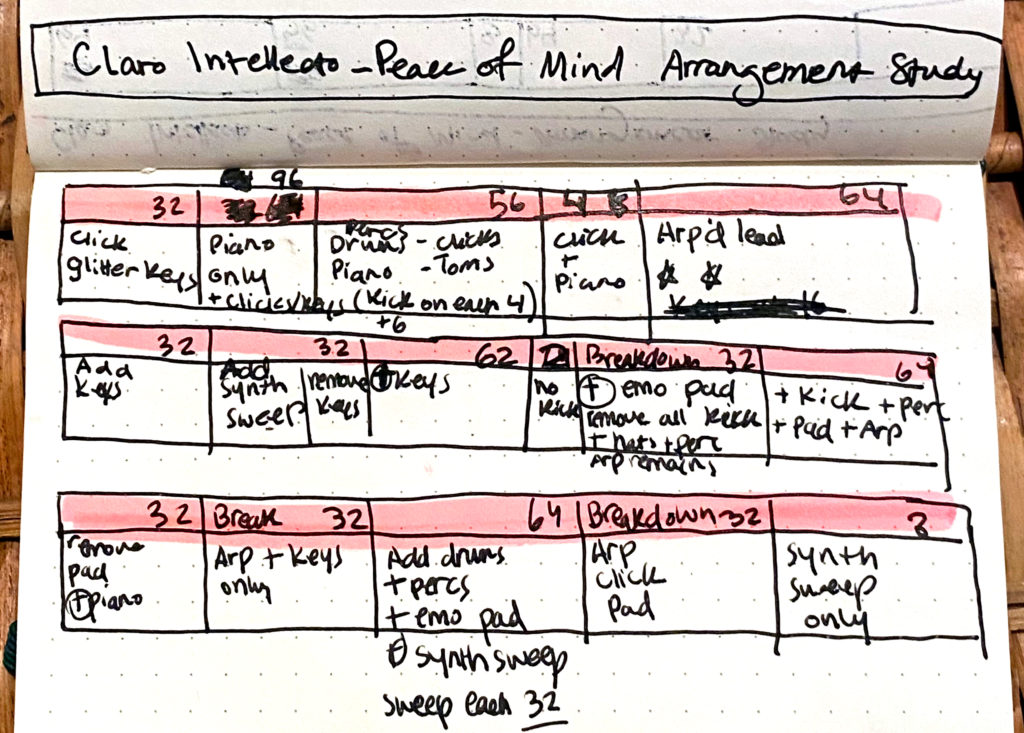
You can listen to the track as many times as you wish, and you’ll note different things each time. Once you’ve finished, you should have a visual layout of the full track on paper, which you can file and go back to whenever you want. For example, if I listen to a song that makes me feel nostalgic and full of emotion, I’ll note it down and then whenever I want to create that feeling in a track that I’m making, I can go back to these layouts and understand how other artists have made this feeling in their work. This practice also allows me to visualize the structure of different songs and this opens up so many new possibilities, meaning I don’t stick to one arrangement due to ease and comfort.
Draw Your Own Arrangement Ideas on Paper
Following the last tip, this tip is about drawing your own arrangement ideas on paper. I find this method to be very useful for capturing a moment of inspiration, especially when hit by an idea while being away from my studio; essentially, I can work from notes rather than bits and pieces of memory.
I often get random bursts of inspiration while driving, bored, or passively hearing other music, so if my notebook is not available, I record my voice by either singing something or explaining the idea with words. Then I bring that into my notebook at the next chance. Additionally, while working on a track, you can draw and redraw iterations of your arrangements as the track is in progress or as new ideas come to you. I tend to make at least four drawings when working on a single track.
My drawings are different based on the idea that I have. Sometimes my ideas include areas of tension and release, and sometimes they are relatively linear. Below you will find three examples:
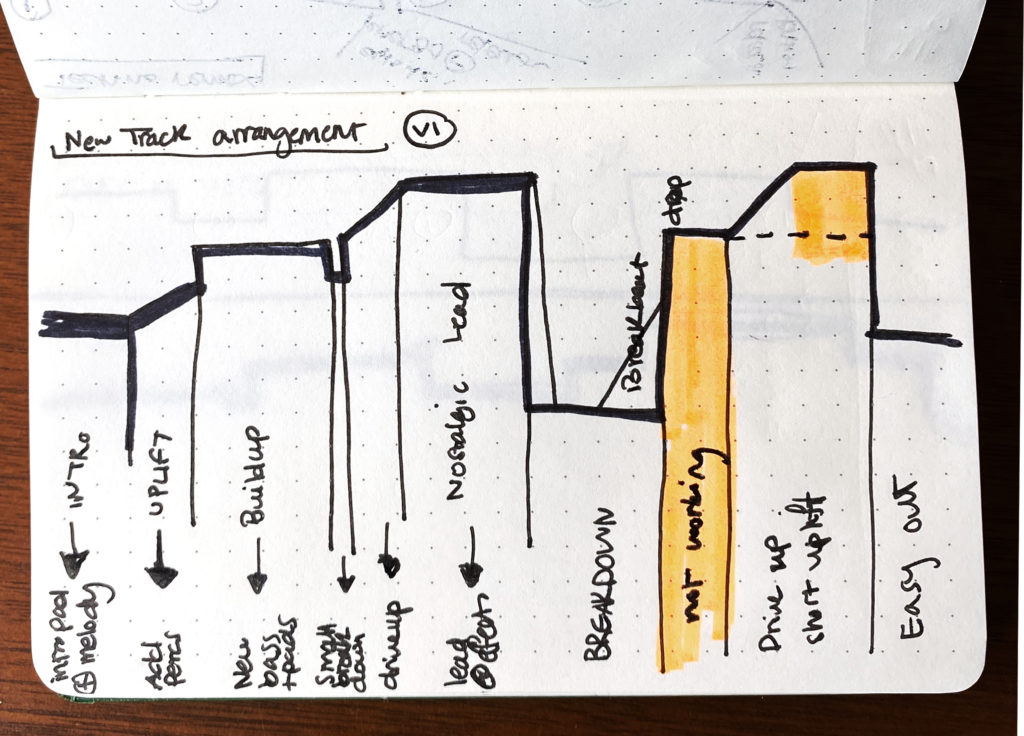
This first drawing shows how I drew an arrangement with the tensions and releases in mind. Thinking of it just like a graph, and starting from left to write, I drew straight lines for areas of linear progression (i.e verses, repeating the same loop for a number of bars). For areas that are building tension and leading to a climax, I drew a sloped diagonal line moving up. For breaks, short or long, I drew dips in the arrangement. The depth of each dip can identify its impact (a short four-bar break from your kick drum would mean a shallower dip in the drawing; while a major breakdown would mean a much deeper one). This drawing contains mainly the arrangement phases, but you can record as many details as you like in your drawings.
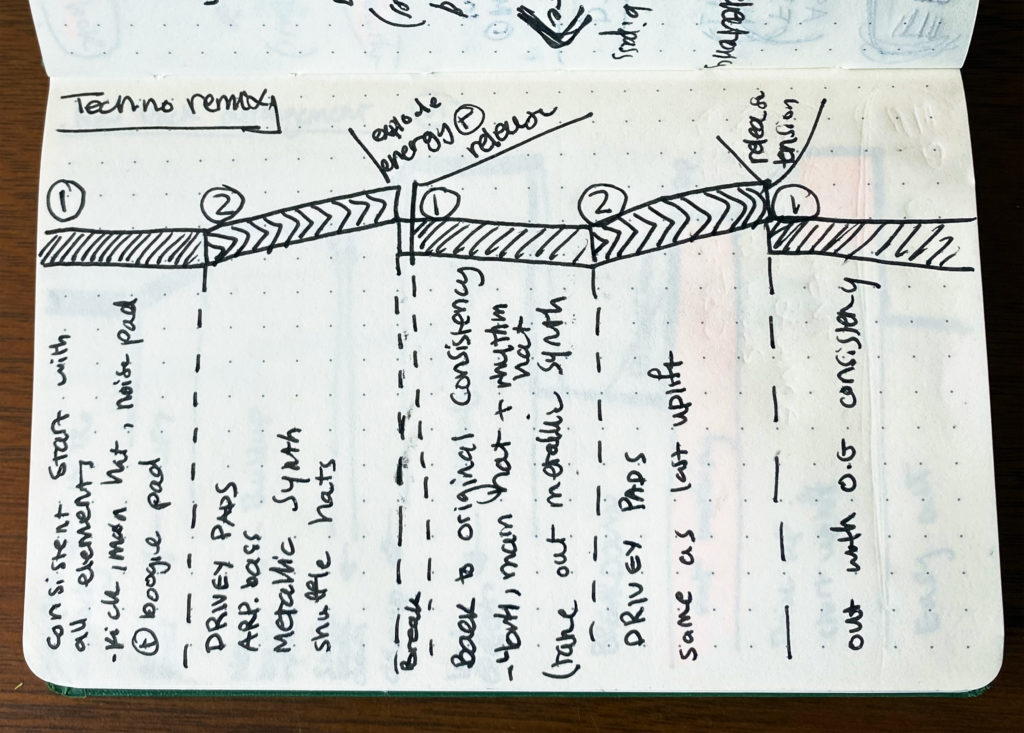
In contrast, this second drawing is of a relatively linear techno remix I am working on. You will see much fewer dips and inclines, and a lot more detail in writing.
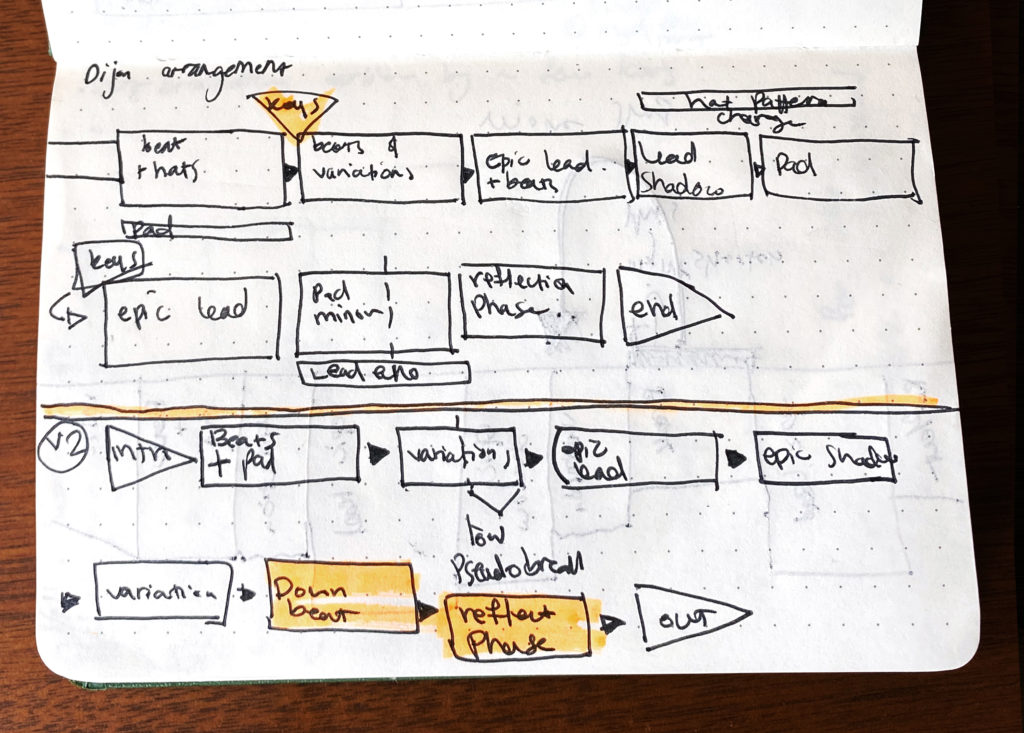
The final drawing shows two versions of the same arrangement I have drawn while simultaneously working on the track, focusing on each section as it leads into the next with markings of ideas that have come to me at various times throughout the process.
With this method, two main elements are being removed: audio and time. The only sense that is at play here is visual. Limiting sensory inputs to this level opens up space for imagination. Since my brain is not occupied with other aspects, I am able to write a storyline by purely looking at the track from a new perspective. This gives more purpose and meaning to my work and makes for a more captivating experience for the listeners.
From Paper to DAW, Creating an Outline Before Adding Details
Once you’ve learned to study the arrangements of others and draw your own, it can be helpful to translate your drawings into your DAW. Going between DAW and paper allows me to think and test ideas a lot faster than trying arrangement ideas inside the DAW alone, because drawing and redrawing is a lot faster than creating, un-doing, and saving new versions of a file.
I use Ableton Live, so this tip refers to Live‘s interface.
To explain this tip, I will draw a parallel to the most basic rule of fine arts drawing, with the example of drawing a portrait of someone’s face. To draw a portrait, first you must draw an outline of the face, then identify the right placement of the facial features, and lastly add details to the features. Beginners in fine arts usually start with the eyes and add all the details, then they draw the nose, usually in the wrong place. Back to music production: when you make a drawing of your arrangement and figure out the general skeleton, you’re essentially making an outline before you focus on details, saving yourself from having to move multi-layered sections around later.
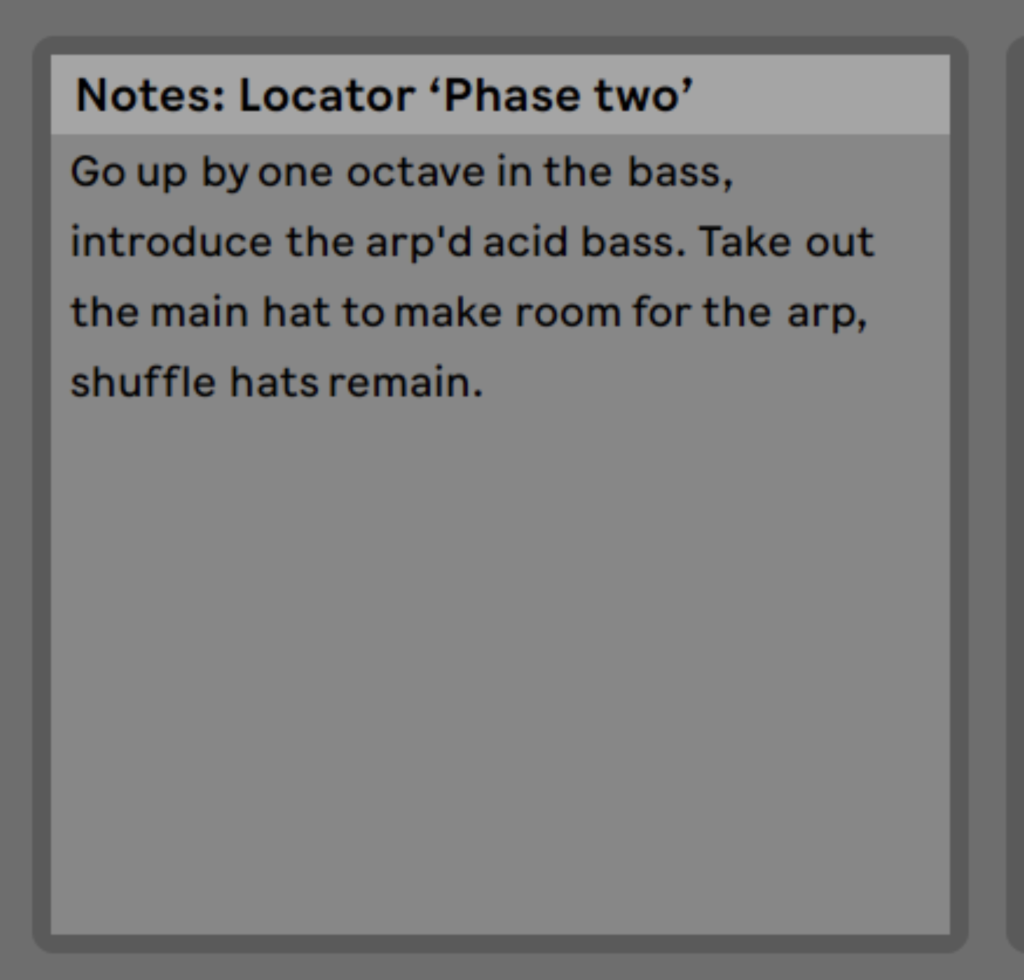
Your drawing of an arrangement should consist of marks or points where specific events in your story happen, and how many bars go in between each event. You can translate your arrangement from paper to Ableton by inserting “locators” on your digital arrangement. It’s easier to add “locators” when you have some primary elements, like drums and a basic melody, so you can listen and count the number of bars passing.
Start laying out the primary sounds in your arrangement with your paper drawing in mind. For each marker or point you’ve created in your drawing, place a “locator” on Live—or whatever DAW you’re using—after the desired amount of bars. Name each “locator” to identify a point in the story and add further explanations inside the “locator’s” notes placed on Live’s “tips” section. This is a good way to create the skeleton of your arrangement as a starting point, and to note your ideas down quickly. My notes usually consist of the key the track is in, the elements I want to add to that “locator” later, and any other ideas that I have.

Use Reflection Studies to Look at Your Work from New Perspectives
This tip is about a technique I use to gain new creative perspectives on a project. When you are stuck with your work for long hours, you become numb to the big picture, and you end up lost in minor details. Every artist, regardless of medium, experiences this.
This is an important part of the creative process, but it’s also good to learn to stretch yourself the other way so you can view your track from a new perspective. Reflection studies are a method of listening and reflecting on a track that allow me to introduce more creativity into my process. Here is what to do.
After you’ve reached a point where your arrangement is complete and you’re pleased with the general skeleton you’ve laid out (at this point I usually have most of my sounds with room for a few more instruments and effects), leave the track be for a while. Don’t listen to it. Let time pass. A week or two. This is a marination period for your ears.
Then, when you come back to it after some time, listen to it with your body turned away from your DAW. Look at the floor or out the window to avoid distraction from your DAW. Avoid focusing on any specific detail. You want to pay attention to the journey, the story, and the arrangement. Keep your attention spread across as many layers as you can.
As you listen, ask the following questions: (i) how is everything dancing together? (ii) does the story have a good flow? (iii) do the flow or individual elements have a purpose?
Then, once the playback has finished, grab a pen and paper. Start jotting down all your immediate reflections. Criticize your track. Note the story you imagined and the vibe you picked up. Also, think of a creative solution for each criticism and write that down as well before you get into your DAW. For each point or criticism that you note, you want to have at least a first step towards improvement imagined and planned out, otherwise you could forget what the true idea or thought behind the criticism was later.
Once you get critical through as many lenses as possible, you start to pin-point improvement areas you may not have otherwise noticed. This could lead to more interesting arrangements, and more organized and consistent storytelling.
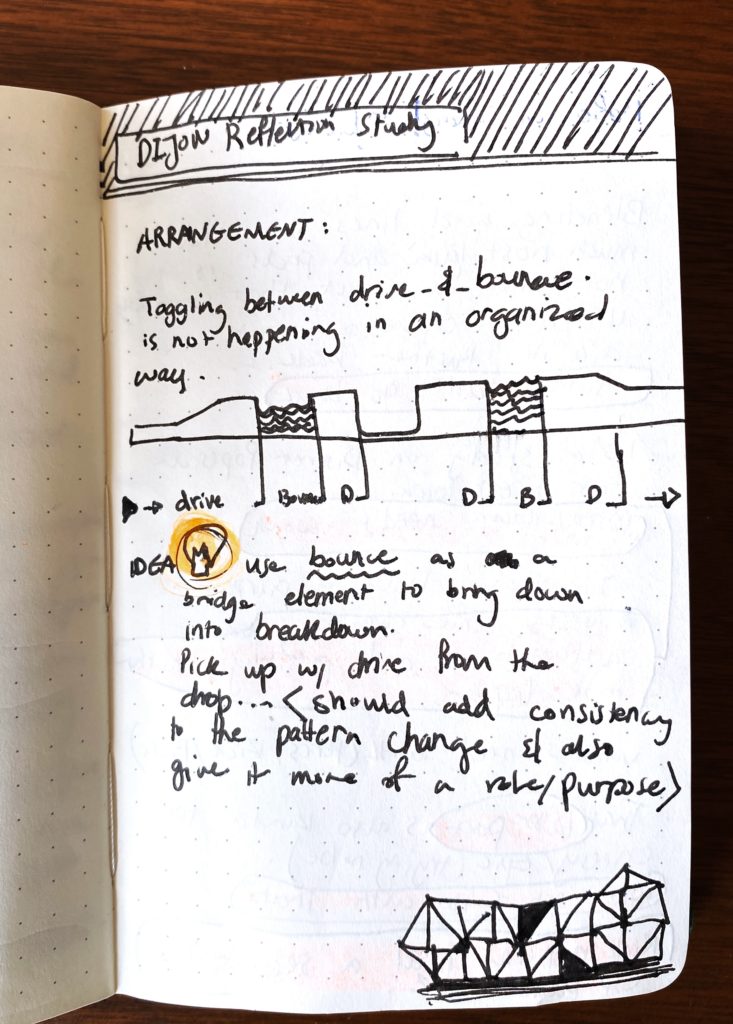
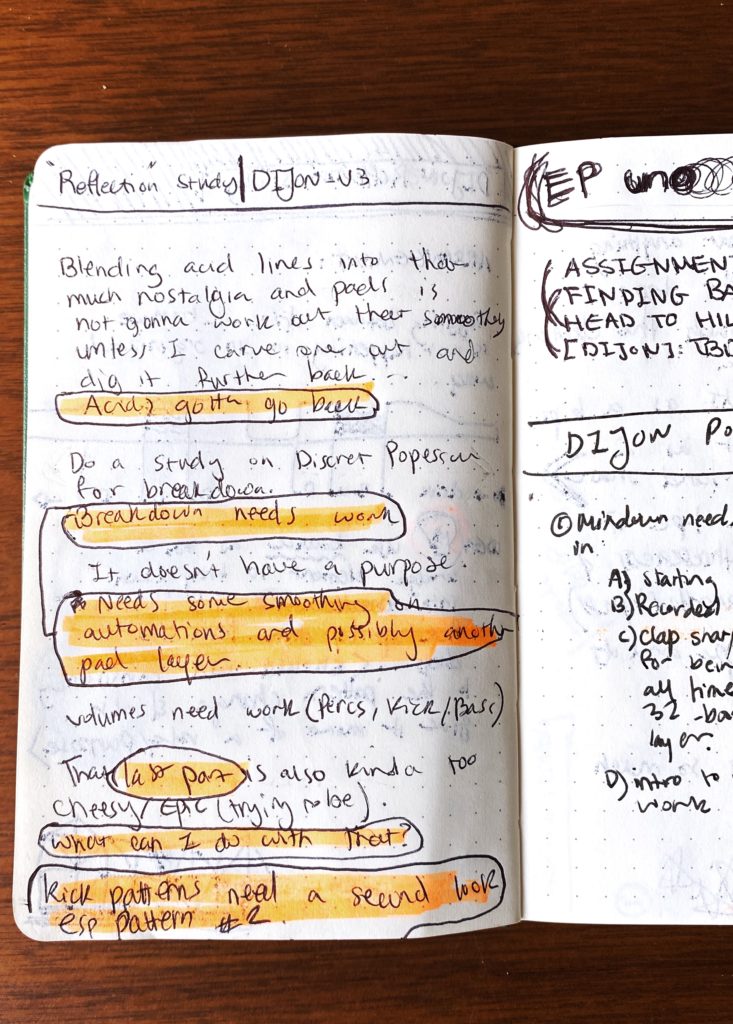
In the following images, you can see the results of a reflection study I did on a track I am working on. I realized that certain parts are not successfully leading into others; that some sections are missing a purpose in the story and need reconsideration; and that certain sounds or patterns need to be revisited.
Use the Listener’s Experience to Drive Your Production
A key component of successful storytelling is putting yourself in the shoes of the audience. This tip touches on thinking about your audience’s emotions to deliver your musical story effectively.
I think most artists, regardless of medium, tend to create based on their own preferences, unless they have user experience training or are able to actively ignore the voice in their own head and imagine the audience.
In my day job I am a Product Designer, also known as a User Experience Designer. In short, I take a user-first approach in order to create designs that are useful and meaningful. I gain this knowledge through research, conversations with the audience, and by putting myself in their shoes. I think about their feelings at any given moment, what purpose they hope to satisfy, and how they can be surprised or delighted. Approaching music production in this way can lead to some creative outcomes.
In your production, think about ways to add interesting twists or surprises for the listener. Think about how they could be feeling with the track at each moment, and what you want them to feel at any given point in a way that satisfies the way you want the story of that track to unfold.
For example, in the recent track I released on XLR8R+ called “Yek O Do,” I intended to tell a distant love story, one that happened in the past, of which the details are faintly remembered but the feelings are still strong.
With this, I immediately immerse the listener in a floaty and dreamy atmosphere. After creating the main pads and melodies and playing it out for different people, I recognized that it takes each person to their own very specific dreamland, as I intended. My listeners tend to look to the top right as their eyes glaze over with imagination, exactly as I hoped.
My second intention was to keep the dreamland experience consistent, yet to smoothly tap into a love story with short vocals that translate from Farsi to English to say “One and two, me and you.”
One thing I personally stay away from in production is forcing feelings with elements that are trying too hard or too loud. In my main breakdown I had a violin sound that was like your classic heart-wrench violin sound that was crying for attention. After some reflection studies—see above—I realized that the violin contradicted the silkiness I was going for. I did not want the listener to get on the floor and start crying, so I swapped it out with a gentle string with a short release. Then I added two more pads to support the string and the fuzzy atmosphere.
Coming out of the breakdown, I wanted the listener to ease back into the groove rather than to get dropped into it again, so I resorted to a short breakbeat pattern in my kick drum that eventually stumbles back into a four-to-the-floor.
In your production, thinking about your story, the feelings that contribute to it, and the way the story unfolds can define the sounds you use and how you introduce them. You could select a nostalgic lead and introduce it suddenly as the protagonist of the story in order to surprise the listener. Conversely, the lead could be a supporting element to another sound, so it could come in slowly and in the background with reverbs and delays.
Selecting your sounds based on the type of surprise you want to create for the listener, and how you want them to feel, can unleash creative ways of matching sound and mood that is signature to only you as a producer.

